
I am not going to go in to too much detail on all the gear I carried and used on the Laugavegur and Fimmvörðuháls Trails, it didn’t actually vary much from what I normally carry on a multi-day, three-season backpacking trip. This wasn’t the time to be messing around and I stuck to tried and trusted systems, gear and clothing. That said, there were at least two completely superfluous items of gear in my pack.
The little RovyVon Aurora A5 USB-C ‘glow-in-the-dark’ Keychain Flashlight I carry on almost all of my backpacking trips was not required. There would have never been any need for it. I walked the trail in mid-July and at that latitude at that time of year it never really gets dark. It was a completely redundant piece of kit.
The second item was my water filter. I had thought that I might need to filter water at the snow melt rivers each day, but on this four day hike, the days were so short that I simply carried a bottle full, and a litre or so in addition in my flexible Evernew bladder, filling up prior to leaving each hut. All of my overnight halts on the Laugavegur had plentiful, free, good-to-drink water, with no need to filter or sterilize or purify in any manner. If I did the trail again, I would probably just include a couple of chemical sterilization tabs for unforeseen emergencies. The Fimmvörðuháls Trail was different. While it is possible to filter water from the occasional snowmelt encountered, it is mostly limited to the two huts, though often available only to those staying the night as the wardens melt snow to produce it. If those simply stopping by want some, there is a cost, if it is available. As it was, despite it being a longer day, I again carried all the water I required from my overnight halt. This was from the Básar trailhead.

As to my water bottle itself. I just purchased a Smartwater bottle of water airside at Luton Airport and fitted it with a clip and cable tie as per my normal DIY method these days. This enabled me to carry it ‘up front’ on my shoulder strap. As well as the little cable tie and clip, I included a length of shockcord for this in my ditty bag and tied this on on arrival. I now don’t bother with the little cord lock I used to use.
Sunglasses and sunscreen. I took both and didn’t require either as I relied on leg covering, long sleeves and wide brimmed hat as necessary
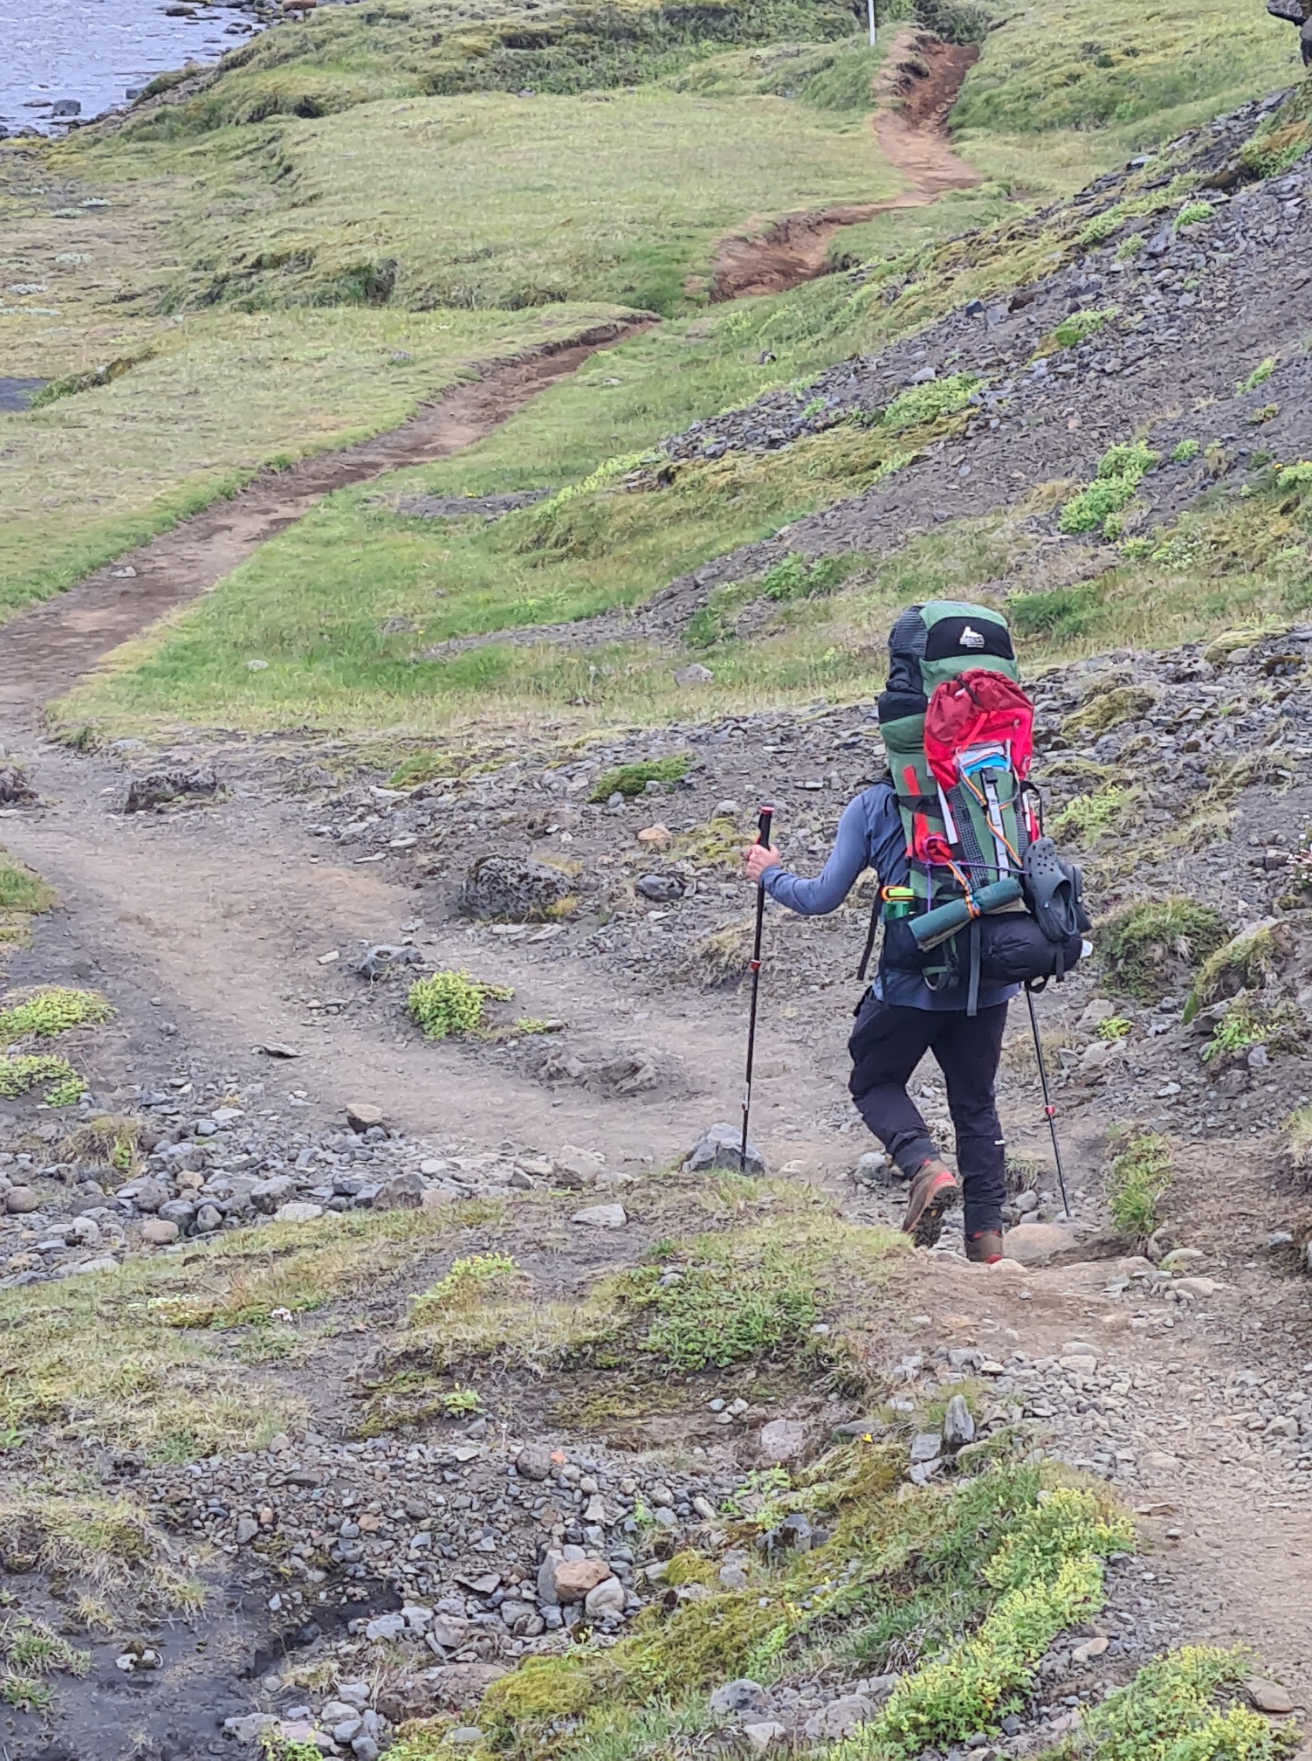
Many people take river shoes for the half dozen rivers that require wading. If that is your thing, fine. I wore trail shoes, merino socks and never bothered with river shoes. I simply waded across and had no issue.

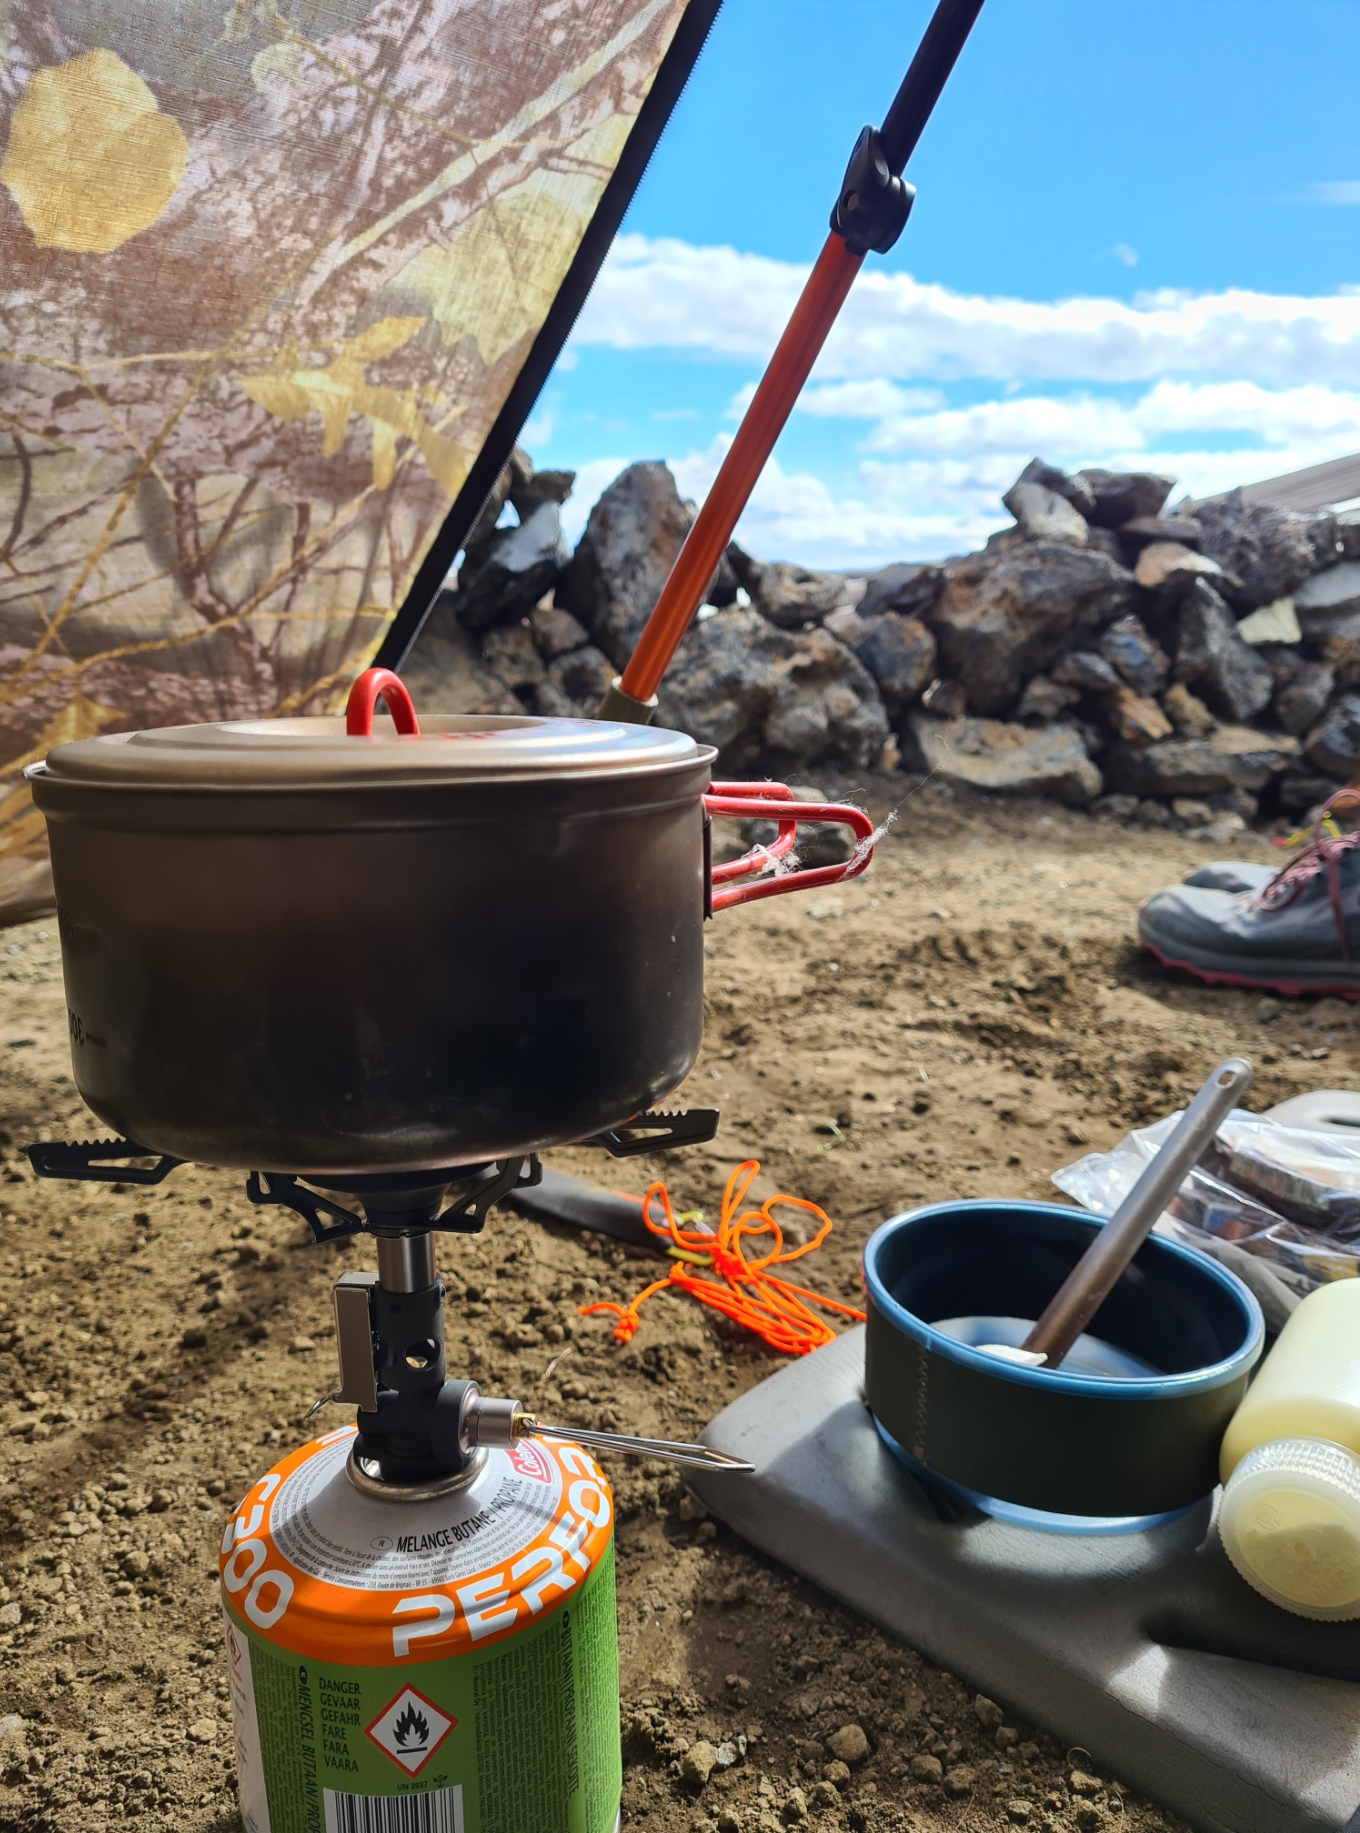
For my shelter, I took my MLD Duomid as it stands up to wind pretty well. I used one of my trekking poles as an upright and twice used both poles in inverted V fashion to add even more stability and strength where I expected strong winds overnight. One mistake I made was not taking snow baskets for the poles, these would have been handy on the snow crossings. I used the solo inner inside the Duomid which gave me a large vestibule area in which to use my gas stove, protected from the wind. The tent worked well but I had two issues. The fine ash and cinders carried on the wind got everywhere and caused my zip to occasionally jam, even jumping teeth. Despite my attempting to wash this free with copious amounts of water, it never really worked well and I need to give this a proper clean, inspection and lubrication now I am back home. The second issue was the material itself. The floor of the inner is made of DCF. While this is a great material, very lightweight, it doesn’t handle abrasion at all well. On the rough gritty floors I got at least a dozen small holes, all simply taped over with small pieces of DCF repair tape. No problem, but a bit of a nuisance.
Gear talk: cleaning a tent zip

I took a full length Thermarest NeoAir NXT mat. This has had a tiny slow leak almost since I bought it that I cannot find. It is a comfy mat nonetheless. This was paired with my lighter weight Katabatic Palisade quilt. I slept well most nights. One little luxury I took was the v5.1 production PadPal inflator for the mat. Weighing just 10g, this is such a good piece of kit, it gets its own blog post. I doubt I’ll ever go on a multi-day backpacking trek without it. The Thermarest pad was carried on the outside of my pack, between my sit-pad and pack. The shelter was carried in a long outside pocket on the side of the pack. It is also likely that the short length of 3mm closed cell Evazote I carried and placed under my mat each night was the only thing that stopped it puncturing on the fine grit that pierced the shelter footprint.
Gear talk: the Pad-Pal v5.1 sleeping pad inflator
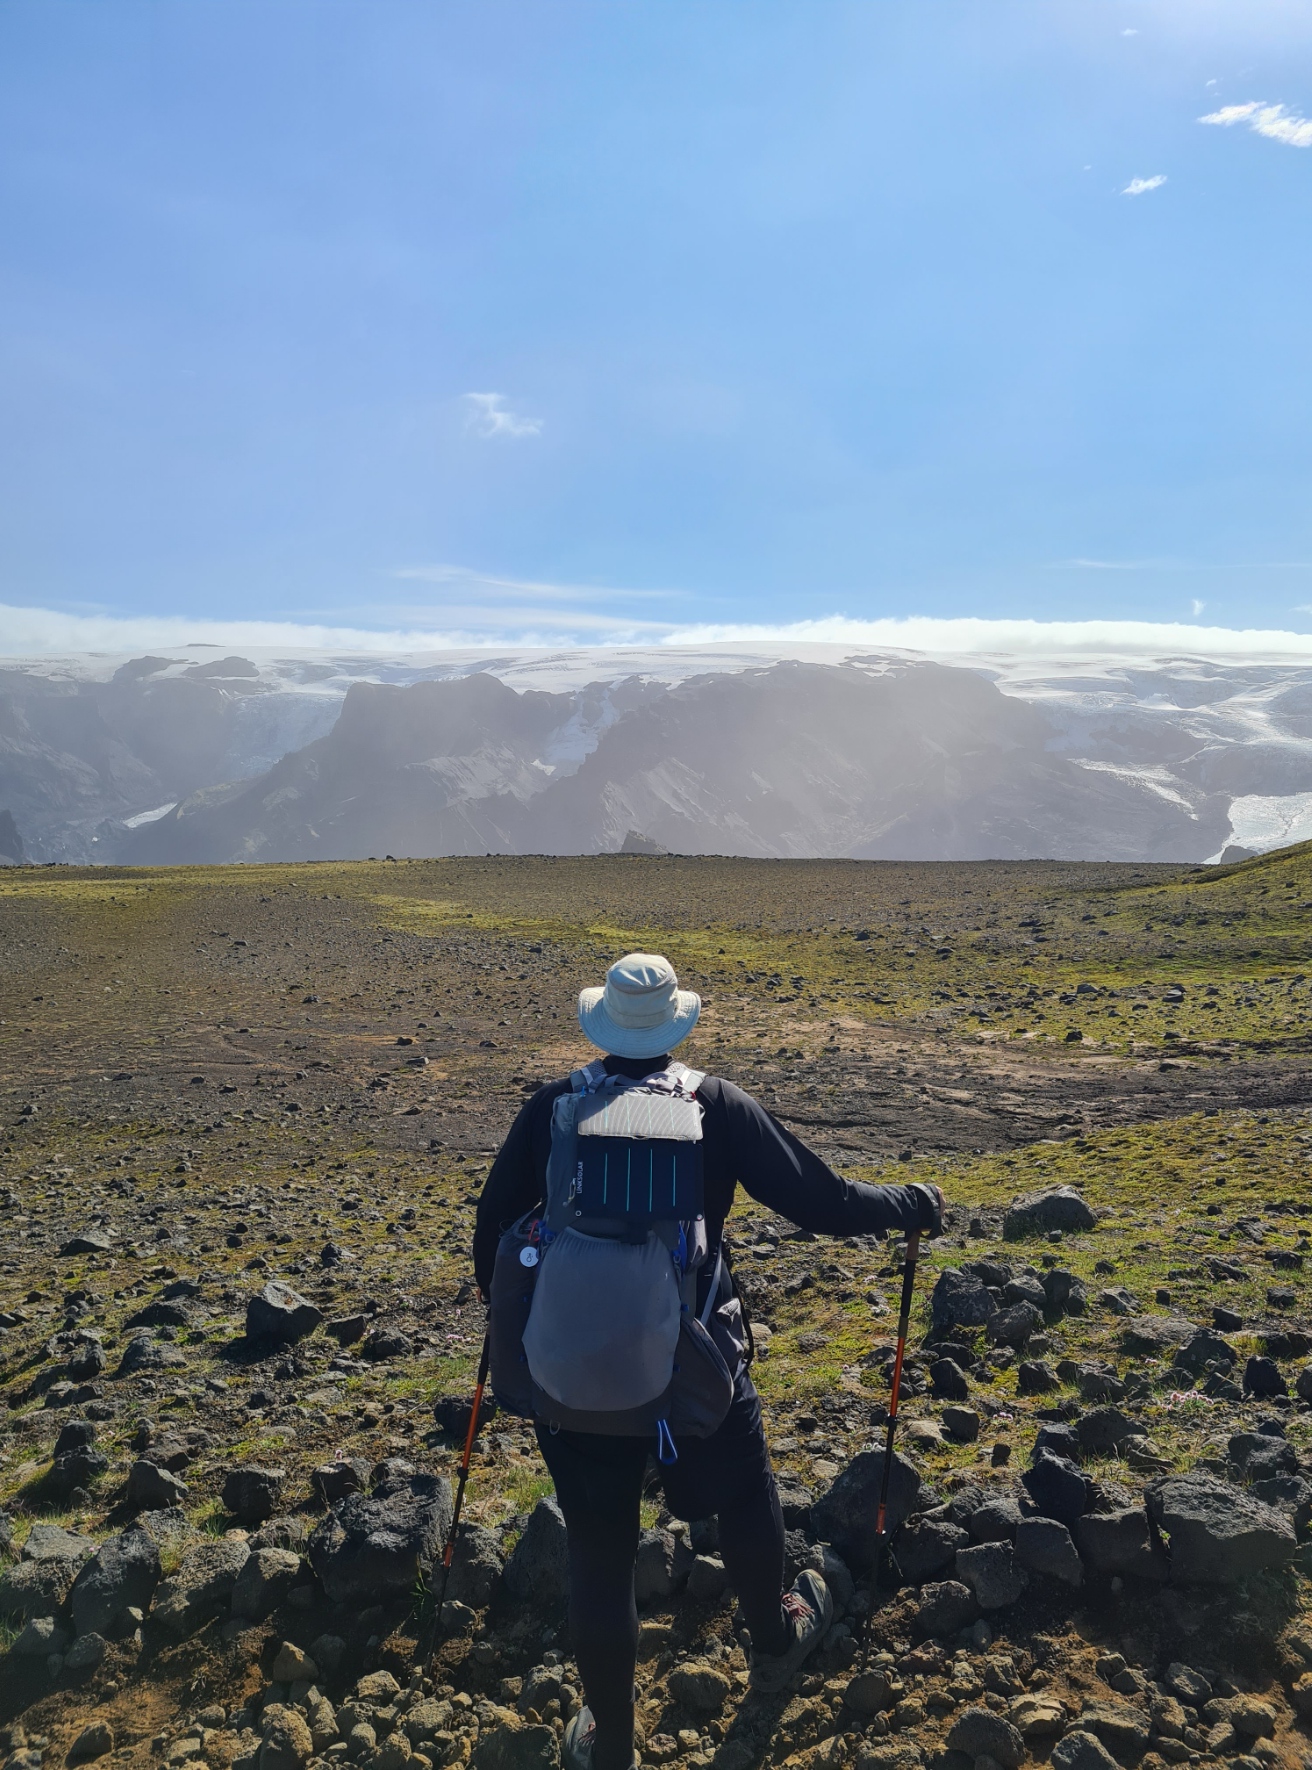
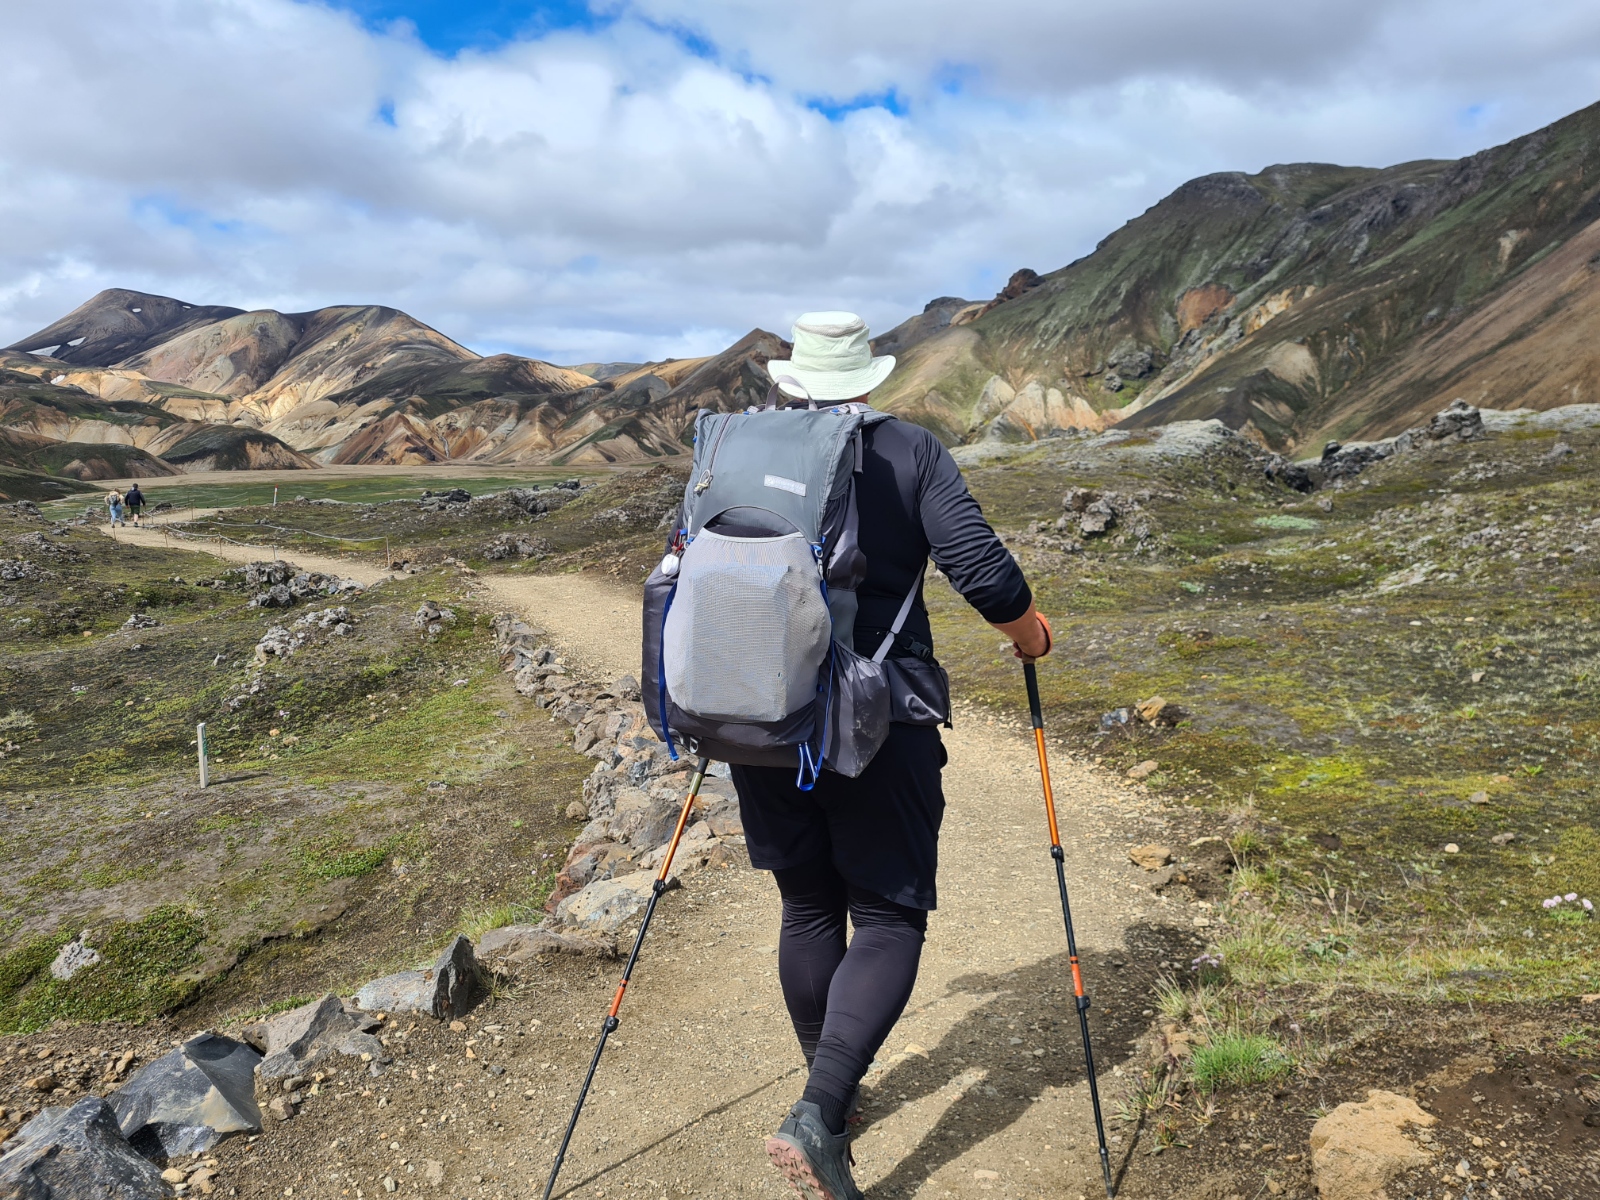
My choice of clothing was pretty much spot on. It was just a little cold for just shorts and I wore thin Arc’teryx tights that were perfect temperature wise, but suffered a couple of holes on slips on sandy/rocky slopes. I wore these with my Under Armour shorts over. I had a couple of slips on steep sandy slopes, ending up on my side or arse, if I had just been wearing the tights and no shorts, they would have been holed. My top was a synthetic long sleeve hoody with thumb loops from Mont-Bell and this proved to be an excellent choice where the sleeves could be pulled right down over the hands or part way up the arms dependent on whether there was a cold wind blowing or strong sun shining. The full length front zip gives lots of ventilation options too. I pulled the hood up just occasionally on draughtier days but most head protection from the sun was via my standard Tilley LT5 wide brim hat. This was swapped out on some colder snow covered slopes for a yak wool beanie from Kora. I wore synthetic Under Armour skiddies, keeping a clean pair in the pack for after the trail. Plus one clean spare pair of socks, also not required until the journey home.

Socks were merino Silverlight. Occasionally, when the wind was especially cold, I slipped on a thin pair of Forclaz merino wool liner gloves. I carried a Lowe Alpine Classic Mountain Cap in the pack but never used it. My merino Buff was always appreciated, as much during the day as a neck gaiter and ear covering as it was as a pillow case at night. Expecting cold evenings and nights (correctly), I had a generic fleece gilet and an old synthetic puffy hoodie from Rab. I carried a windshirt (Patagonia) and windpants (MontBell), both infrequently used and appreciated when they were. I took waterproofs but never needed them. The waterproof jacket was a FroggToggs Ultralite, these are extremely fragile, light and very cheap. There are no thorns or anything else to snag a jacket so meant that this would be unlikely to be damaged if required.
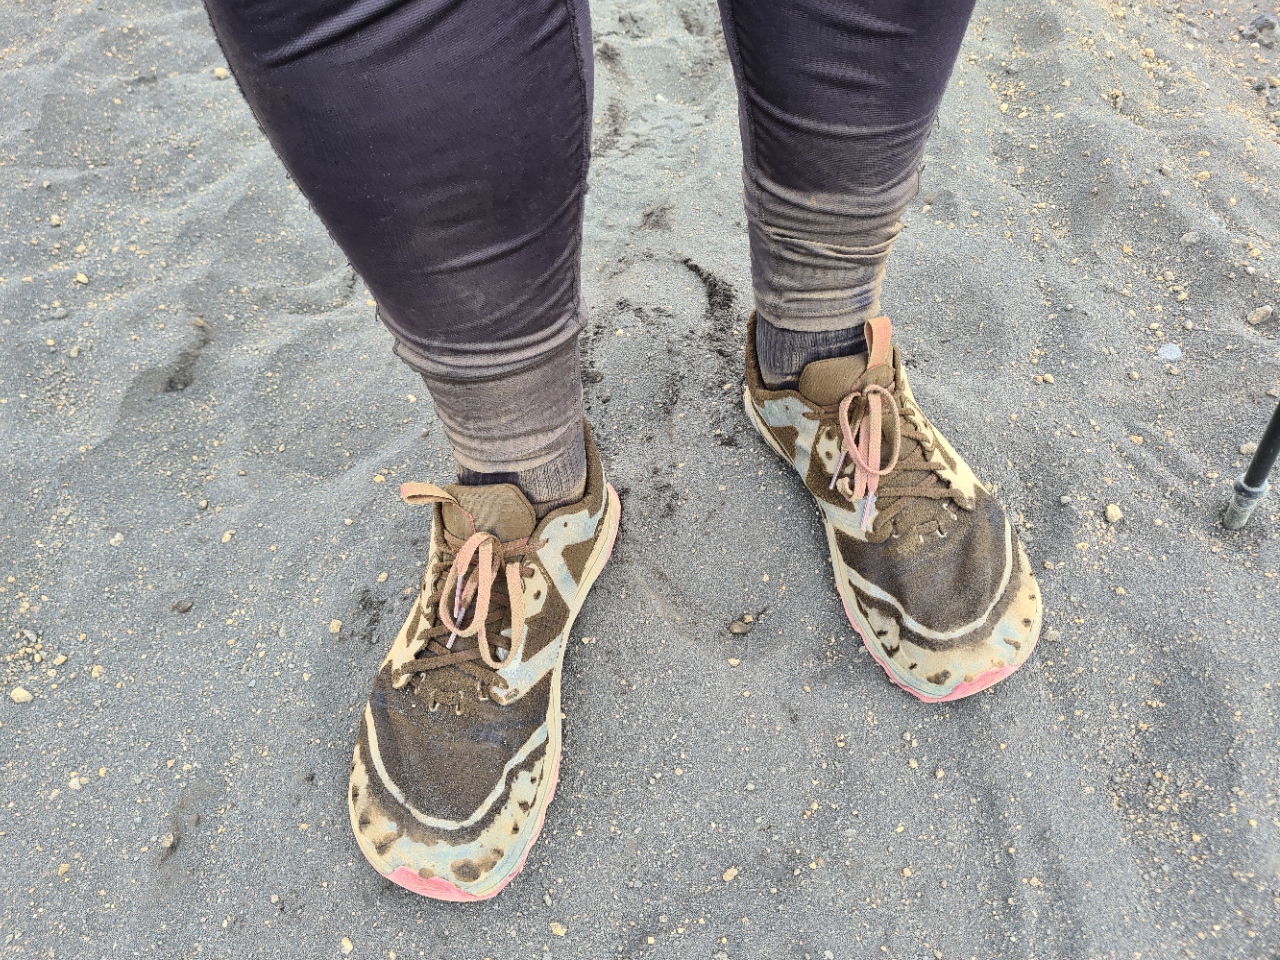
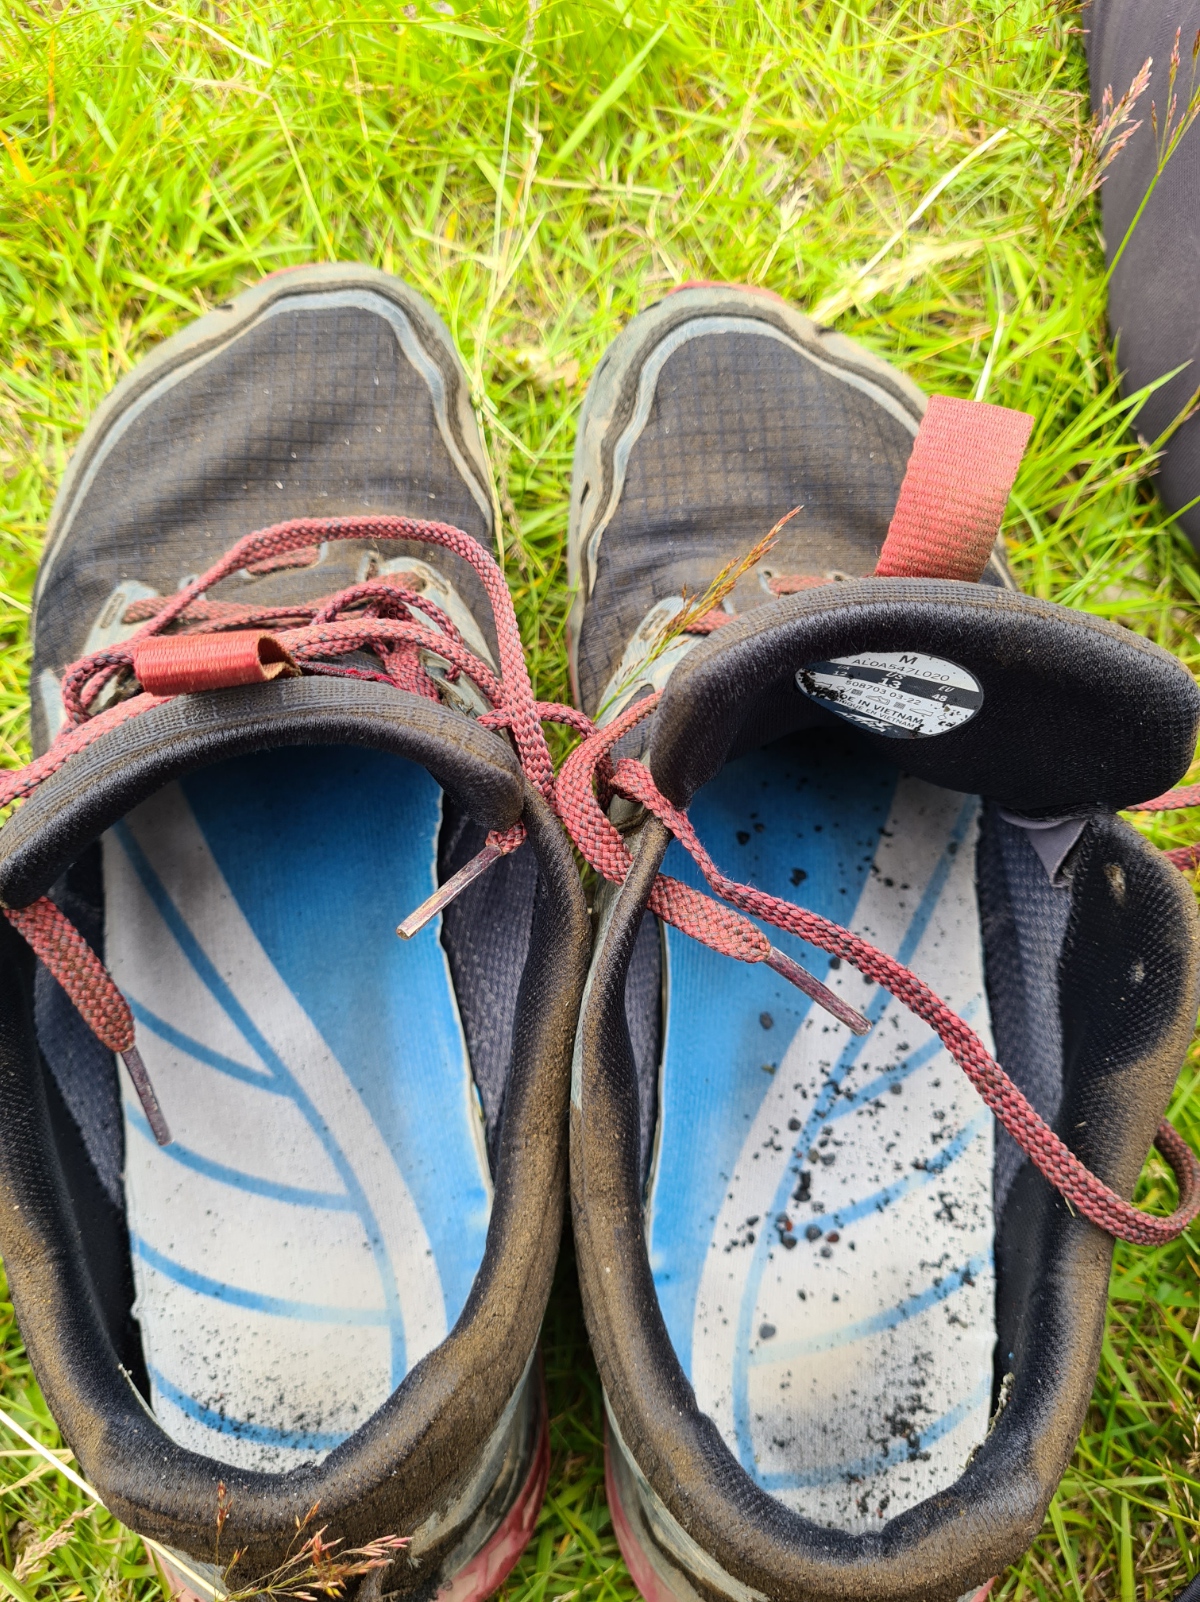
The trail shoes were my final pair of Altra Lone Peak 6’s, before I move on to the 7’s. I was comfortable in these, sure footed, and had no feet issues at all despite fine ash and cinder often making its way into the shoe. It was probably this that caused some wear on the inner heel cup of the right shoe. These were also worn on river crossings. I hope Altra have used a tougher inner lining material with the 7’s. I used the Arch Angel insoles I am trialling this year and I noted that they didn’t soak up water on river crossings like the original Altra insoles do.
Even taking your time, it shouldn’t take more than five or six days to hike both trails. Many people can stretch phone and power bank power to that period of time. For this trail, I was totally off-grid and carried no wall charger. I took a lot of photos and messaged wife and family frequently. All my documents were in digital form on my phone and I wanted to ensure plenty of power for my needs.
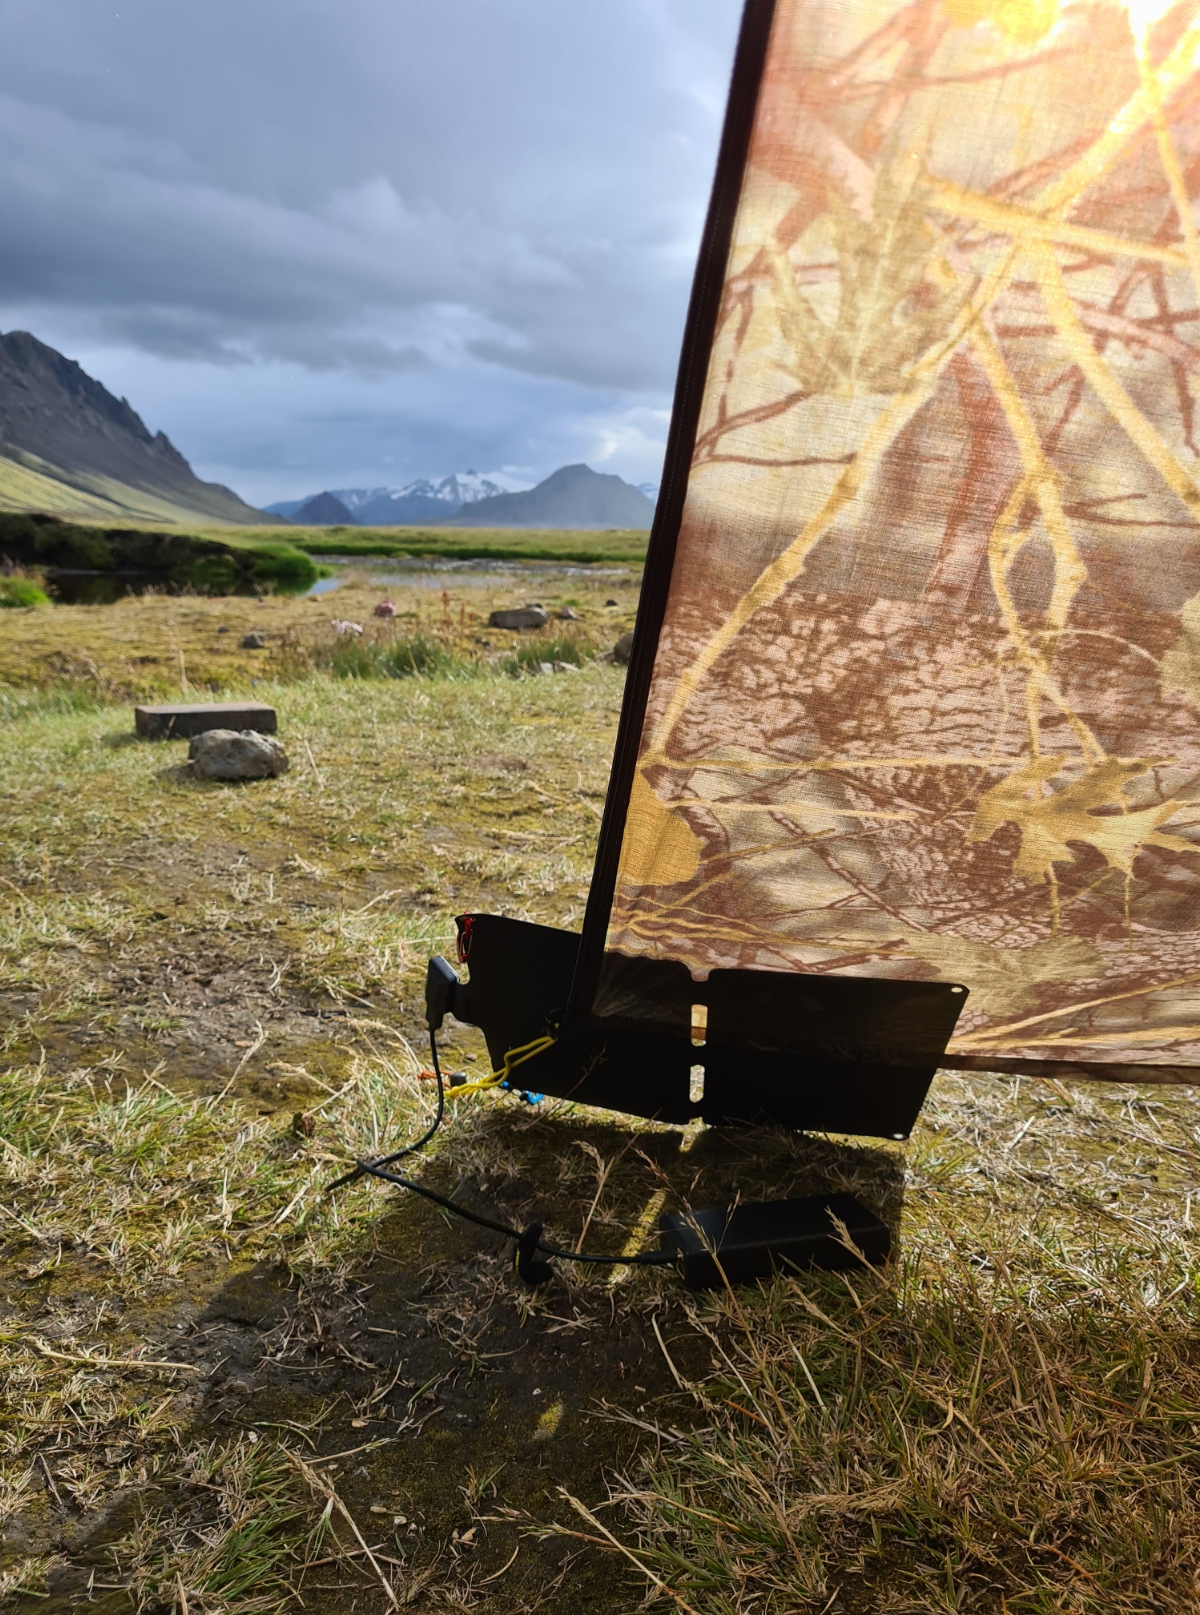
I carried phone, powerbank and solar panel/charger. As said, there is a lot of daylight at this latitude and the occasional trickle charge into my powerbank meant I arrived home with as much power as when I started. It is a heavier option, but suited me admirably. I never used the solar panel every day, I didn’t need to. On some days I carried it clipped to my pack, on some sunnier post hike afternoons and evenings, I leant it against my Duomid, oriented to the sun.
Gear talk: lightweight solar panels
Flying:
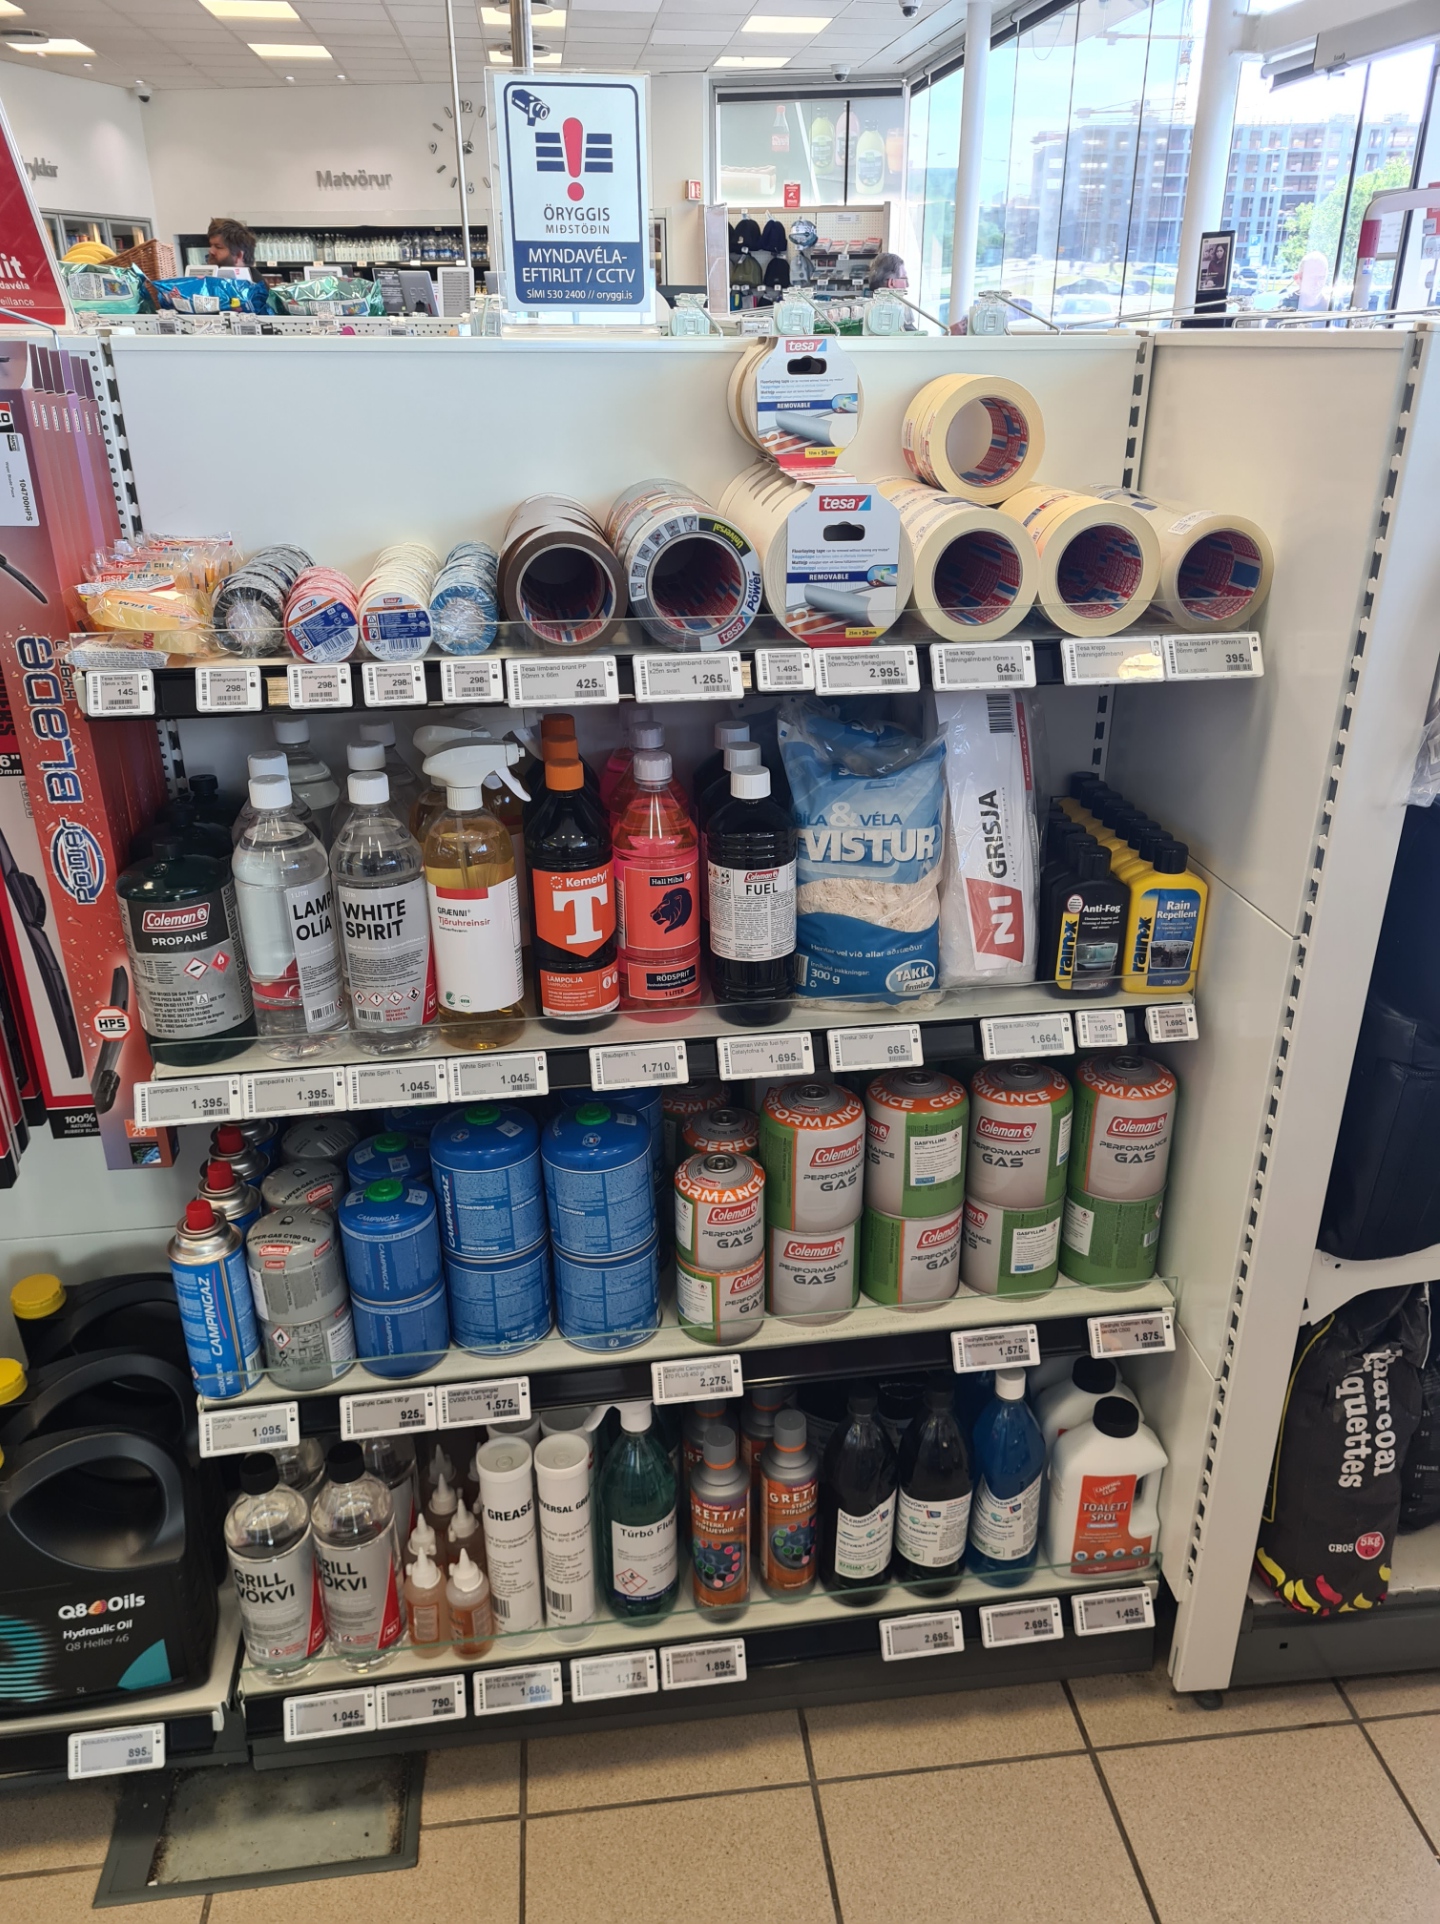
Flying with backpacking gear can be a little problematic. You can’t fly with gas canisters for example. I found no difficulty in locating canisters in the two outdoor gear shops that I saw, petrol stations and supermarkets. As it was, I purchased mine immediately on arrival at the central BSI bus station in Reykjavik. The petrol station next door to it stocked an even wider range, and cheaper than I had paid just five minutes before.
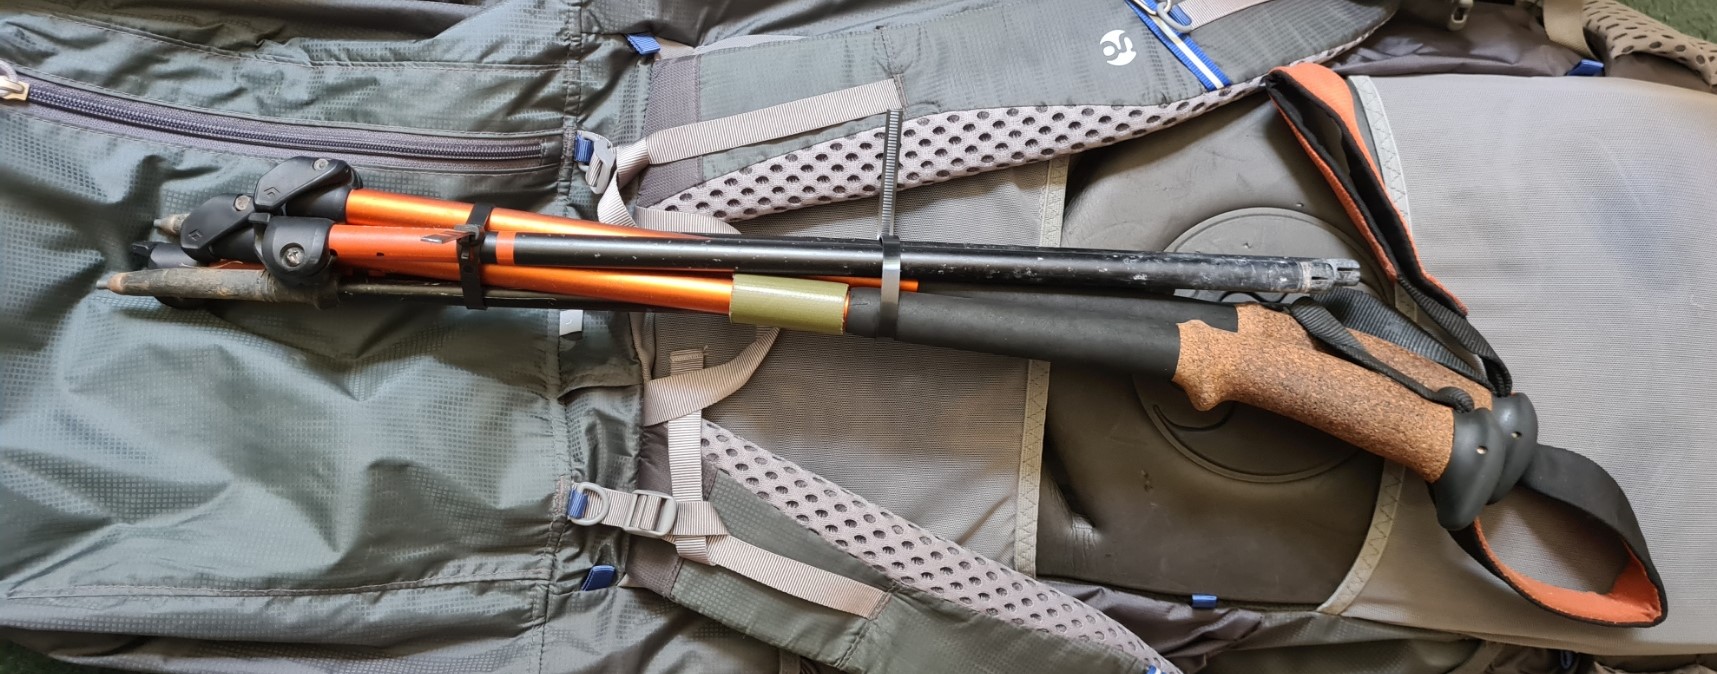
Trekking poles cannot be taken into the plane cabin, so I completely dismantled my two poles (also used to erect my shelter each night) and stowed them inside my pack, which then went in the hold. The six sections were kept together with two trimmed, reusable cable ties, each tie weighing less than 3g. The pointy pole ends were prevented from poking holes in my pack from within by nestling them into my tough Tilley hat on the outward journey, and a Swedish Cloth for the return flight.
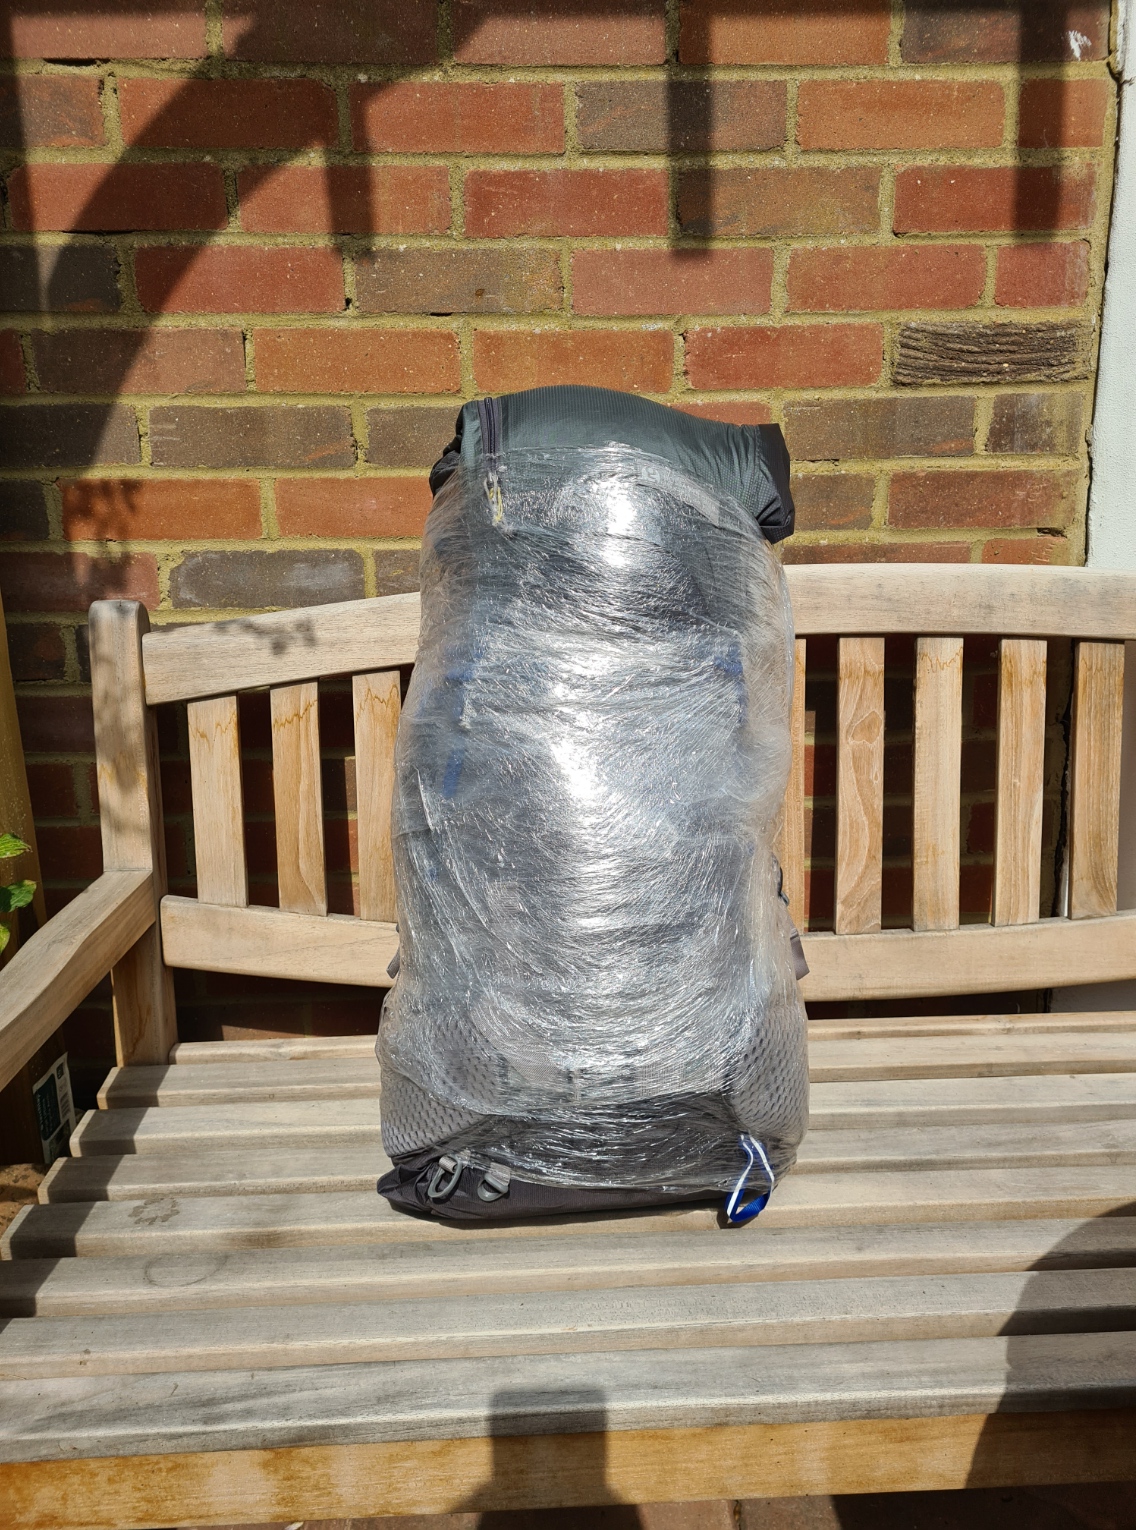
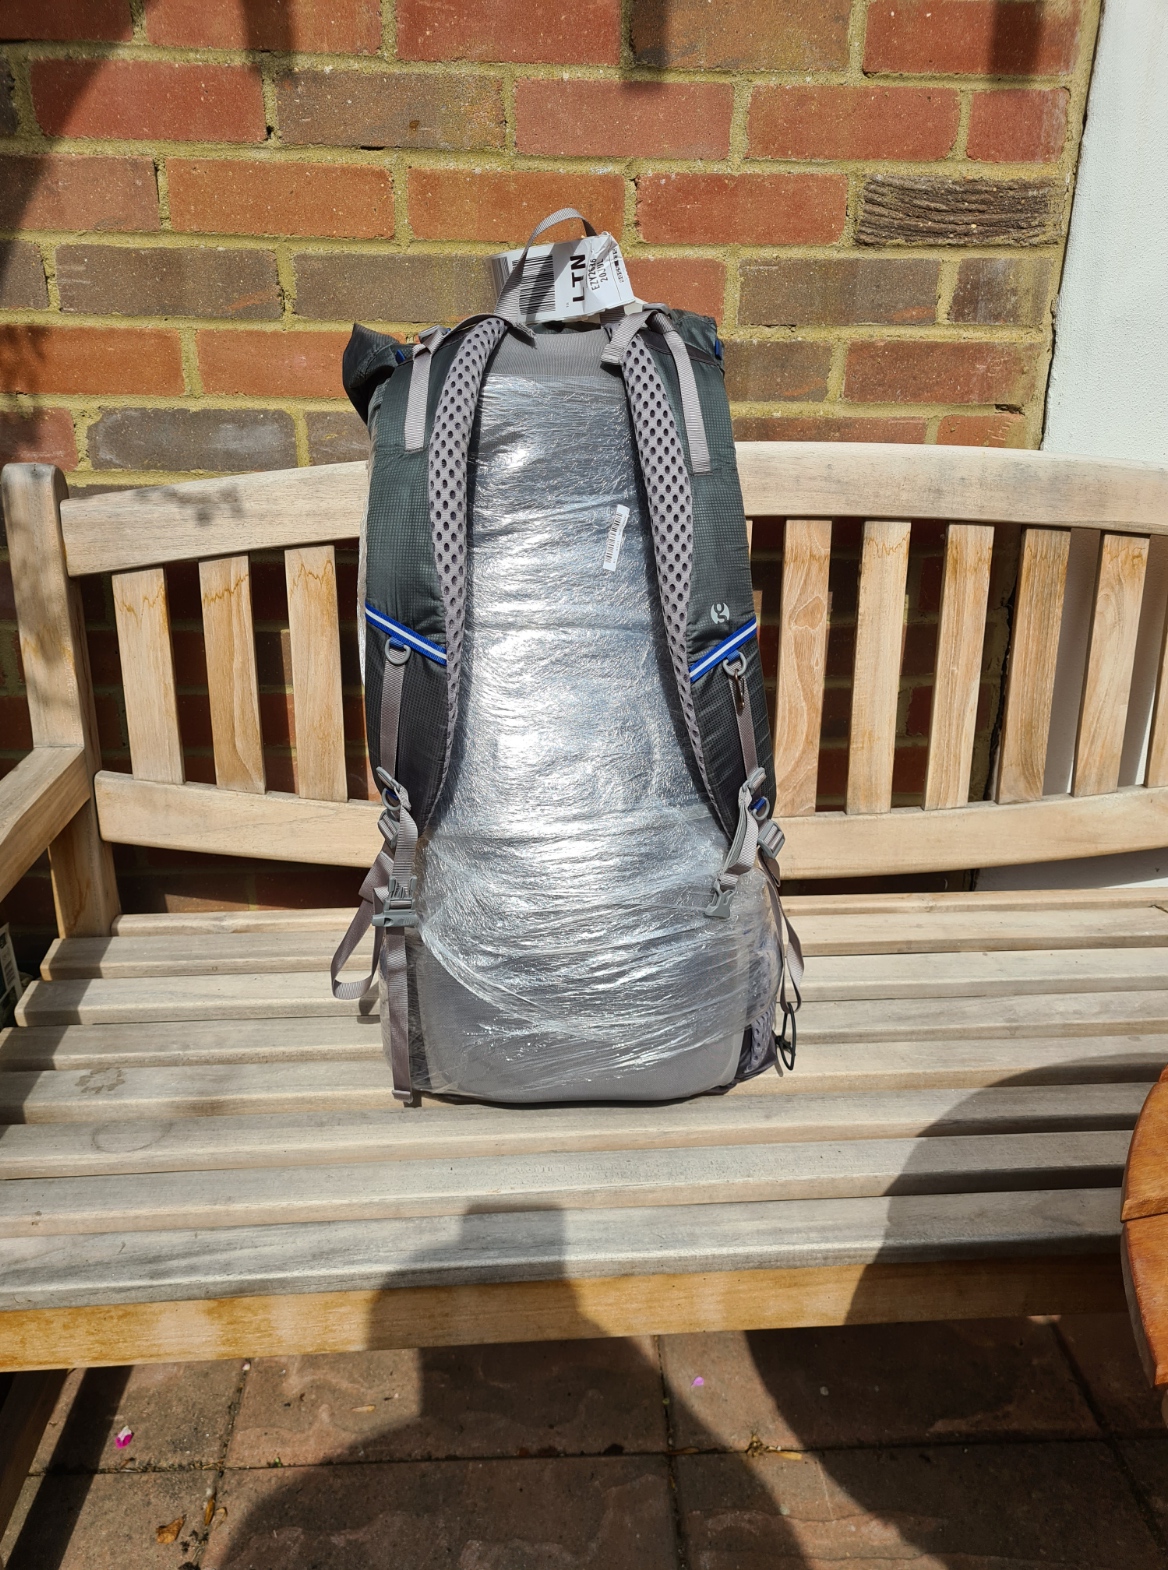
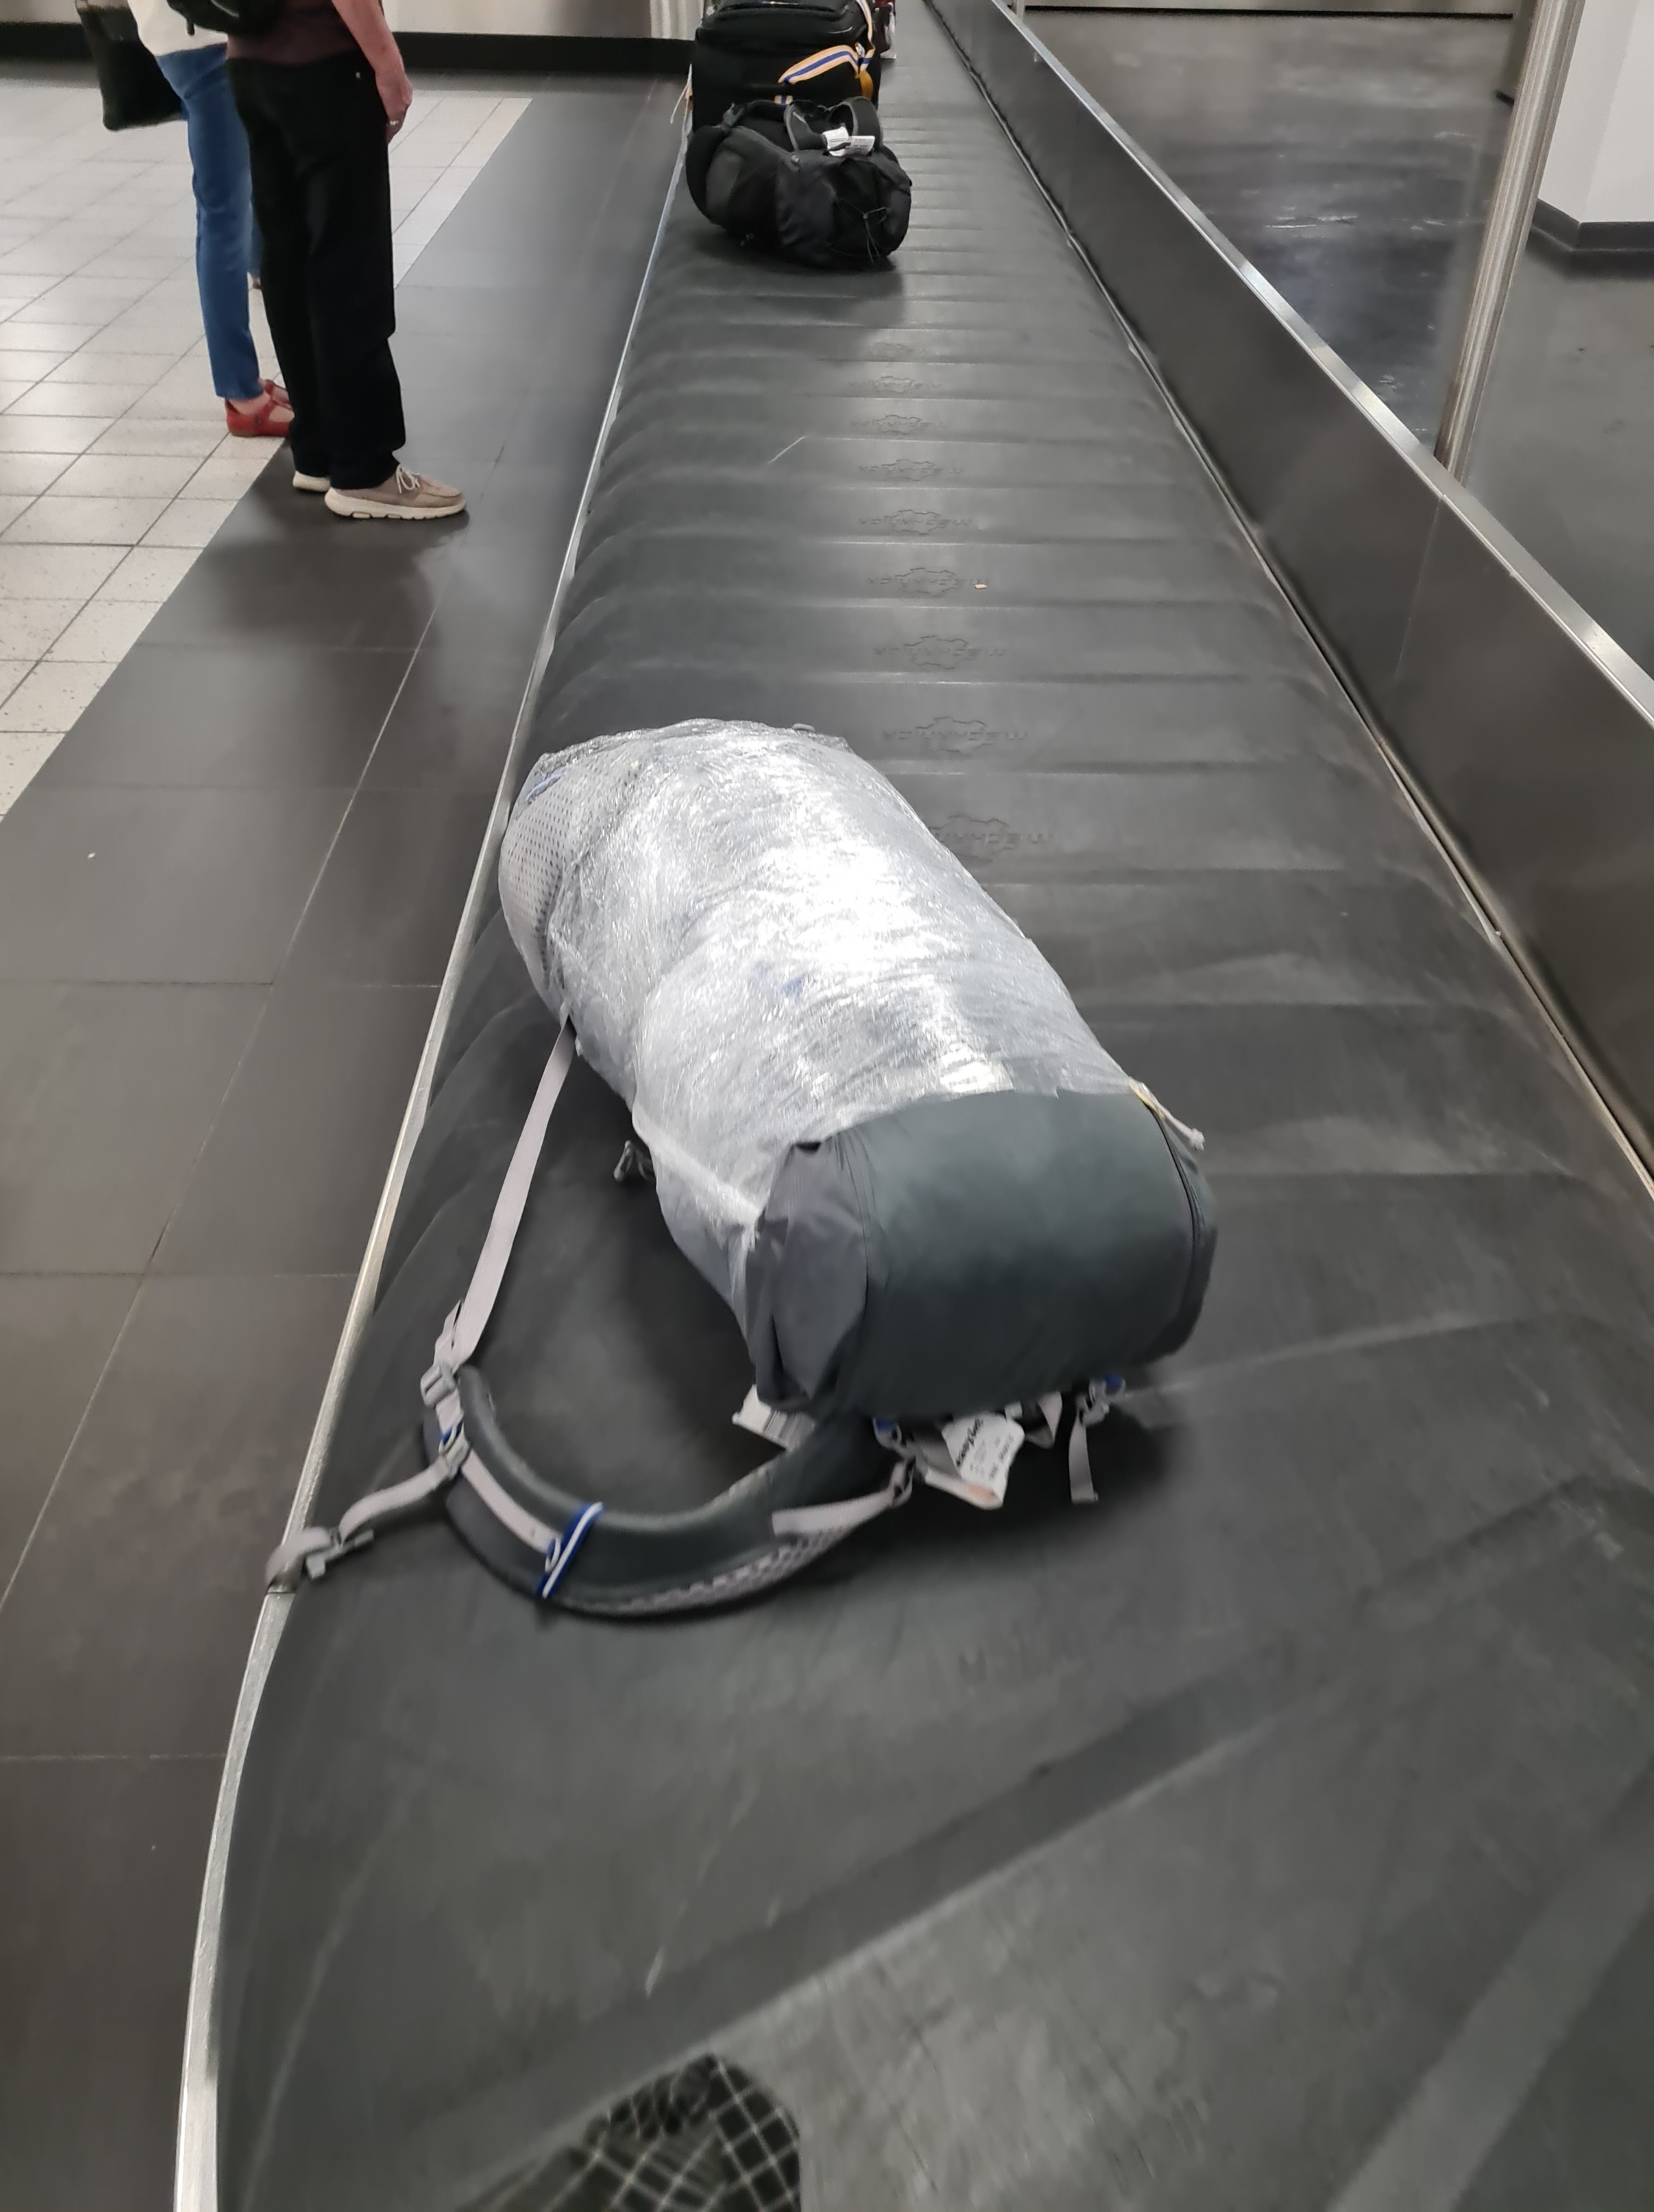
Baggage Handlers are notorious for not being particularly careful with baggage, there are a lot of straps and peripherals on a pack and I wanted to lessen the chance of things getting caught with resultant damage. I took off everything I could from the outside of the pack. The Gossamer Gear pack will allow the hipbelt to be removed but I just fastened the belt around the body of the pack. Everything that could, went inside the pack. Other than passport, valuables, water filter and powerbank, which I carried in my chest pouch which became my hand luggage. While not the most environmental of solutions, I clingfilm wrapped the entire pack prior to leaving home, leaving just the shoulder straps loose. After walking the trails, I purchased a roll of food wrap in a Reykjavik supermarket to repeat this for my return flight.
Be warned, I met a couple of backpackers who had lost their luggage while flying from Canada to Iceland. They had spent the day dashing around Reykjavik trying to buy everything they required for the trail. Travel Insurance went a long way in permitting them to do this.
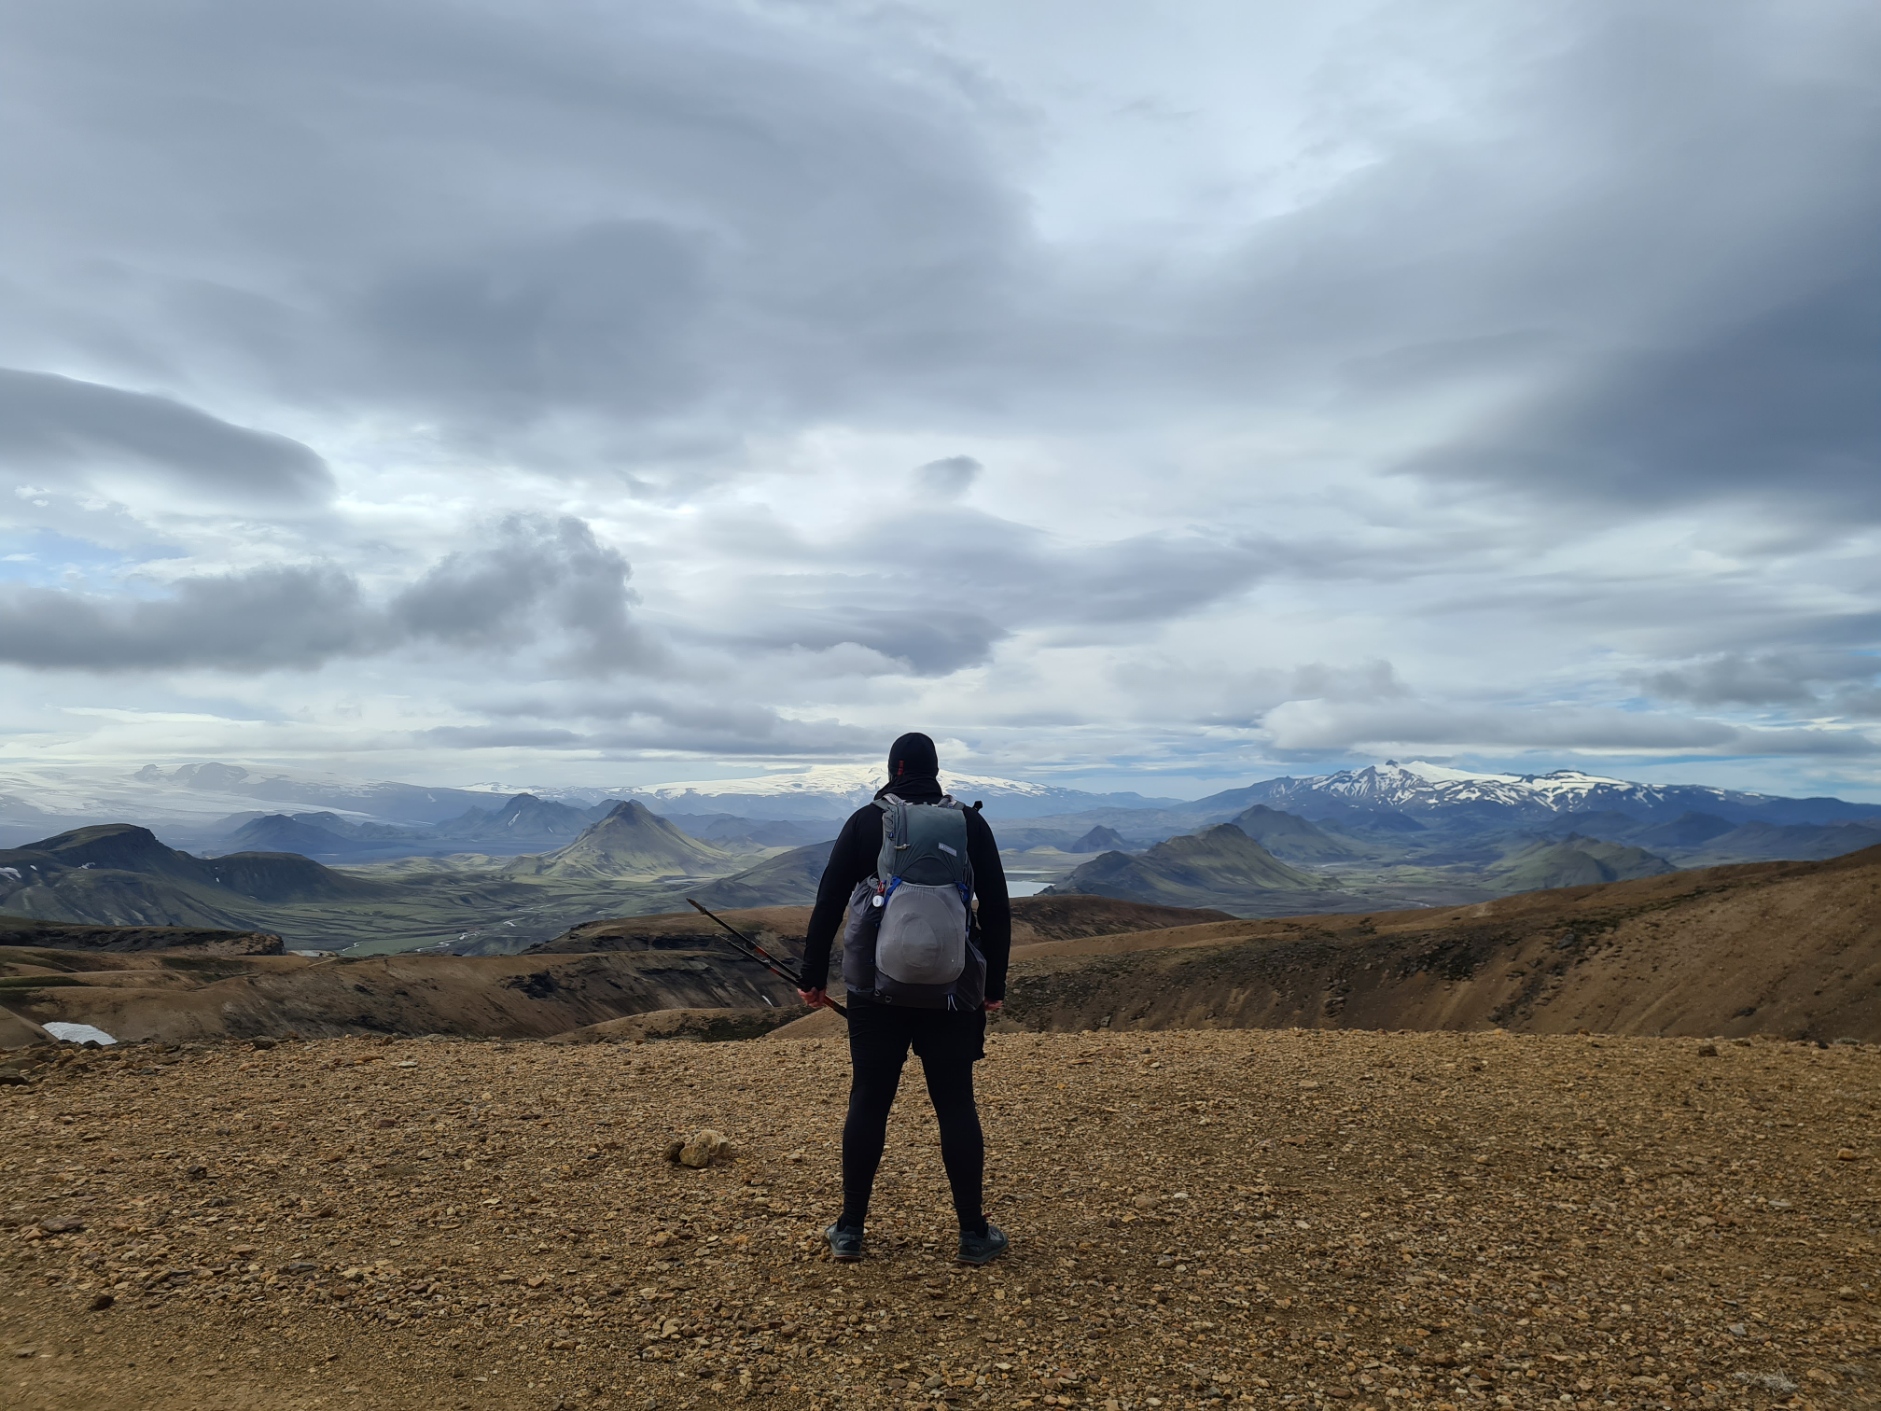
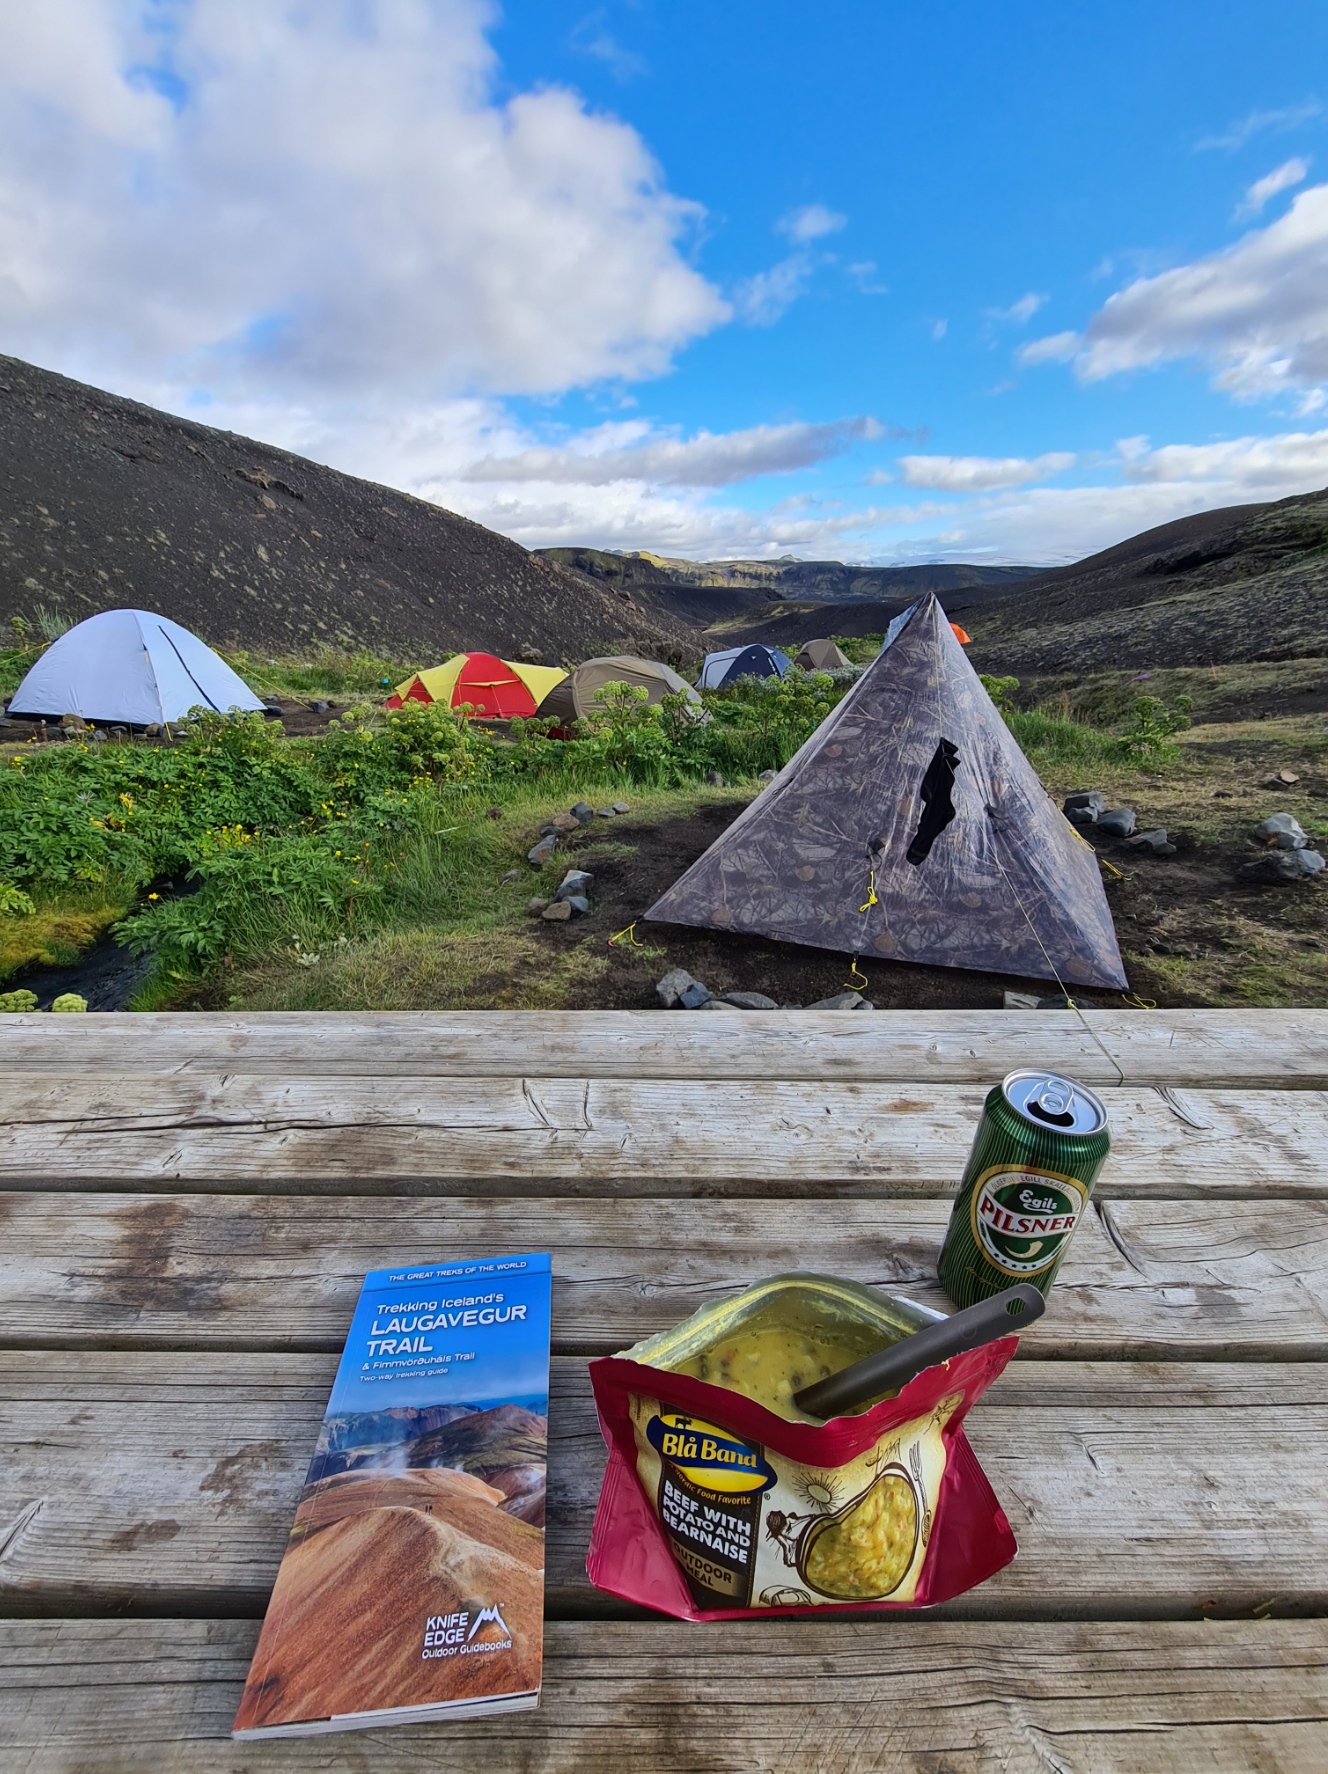
Trail signage is superb. I was also extremely lucky with weather throughout and was never navigationally challenged. It isn’t always like that. Blizzards can occur at any time of year and hikers have died as a result of weather and trail conditions. It is a foolish person who ignores the advice from the wardens and doesn’t carry good and familiar gear to stay safe and on course. Food and water should always be carried on trail. I carried map, guidebook, compass (never used) and a phone as back-up (never required for that purpose).
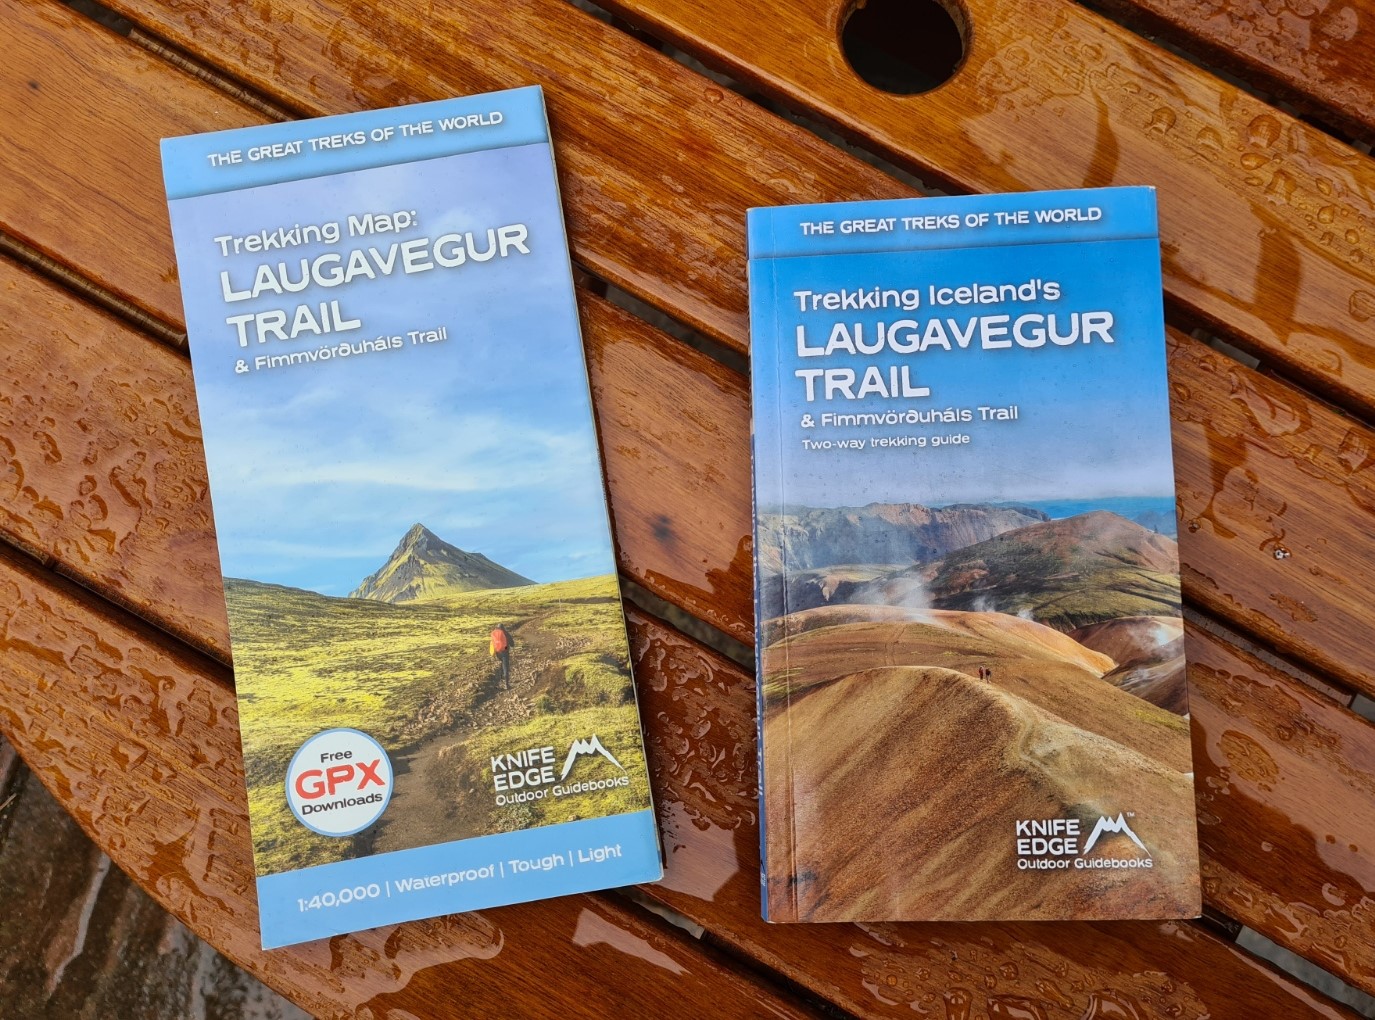
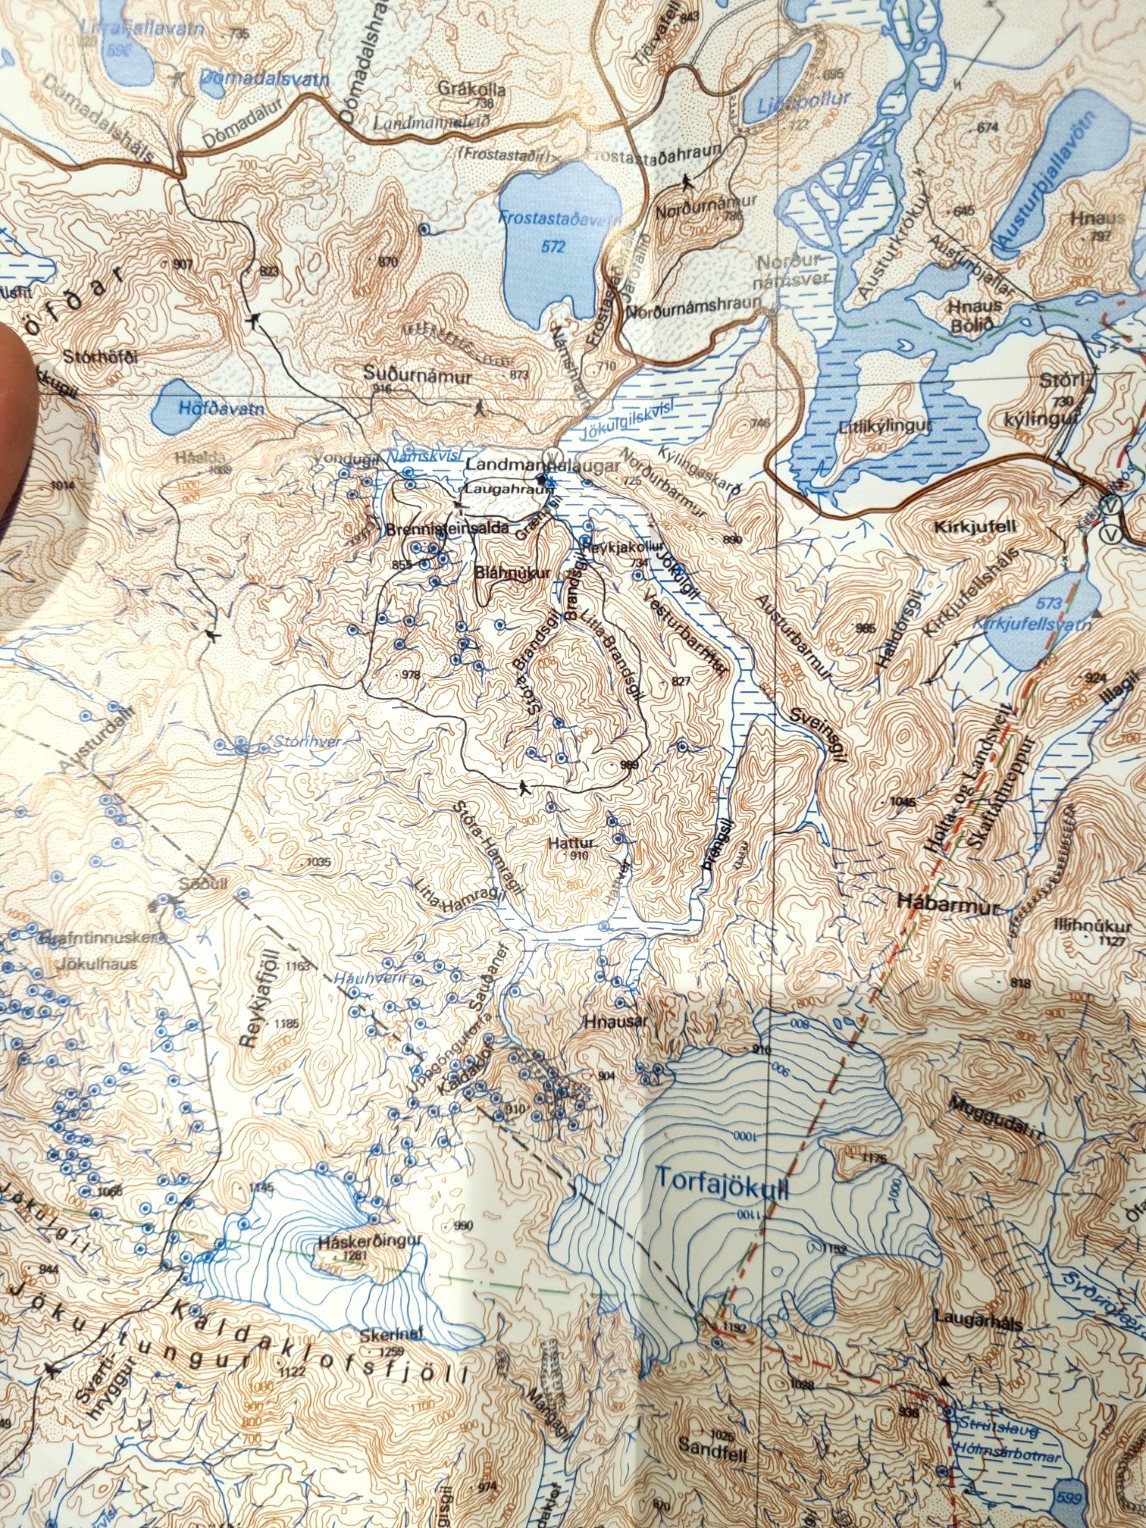
Everyone on this trail should carry a map. I carried the Trekking Map for the Laugavegur and Fimmvörðuháls Trails produced by Knife Edge Outdoor Guidebooks. This is to a scale of 1:40 000. I also took the Knife Edge two-way trekking guide book to the trail, which is very good and probably all that is required, as it also contains the same map in strip format.
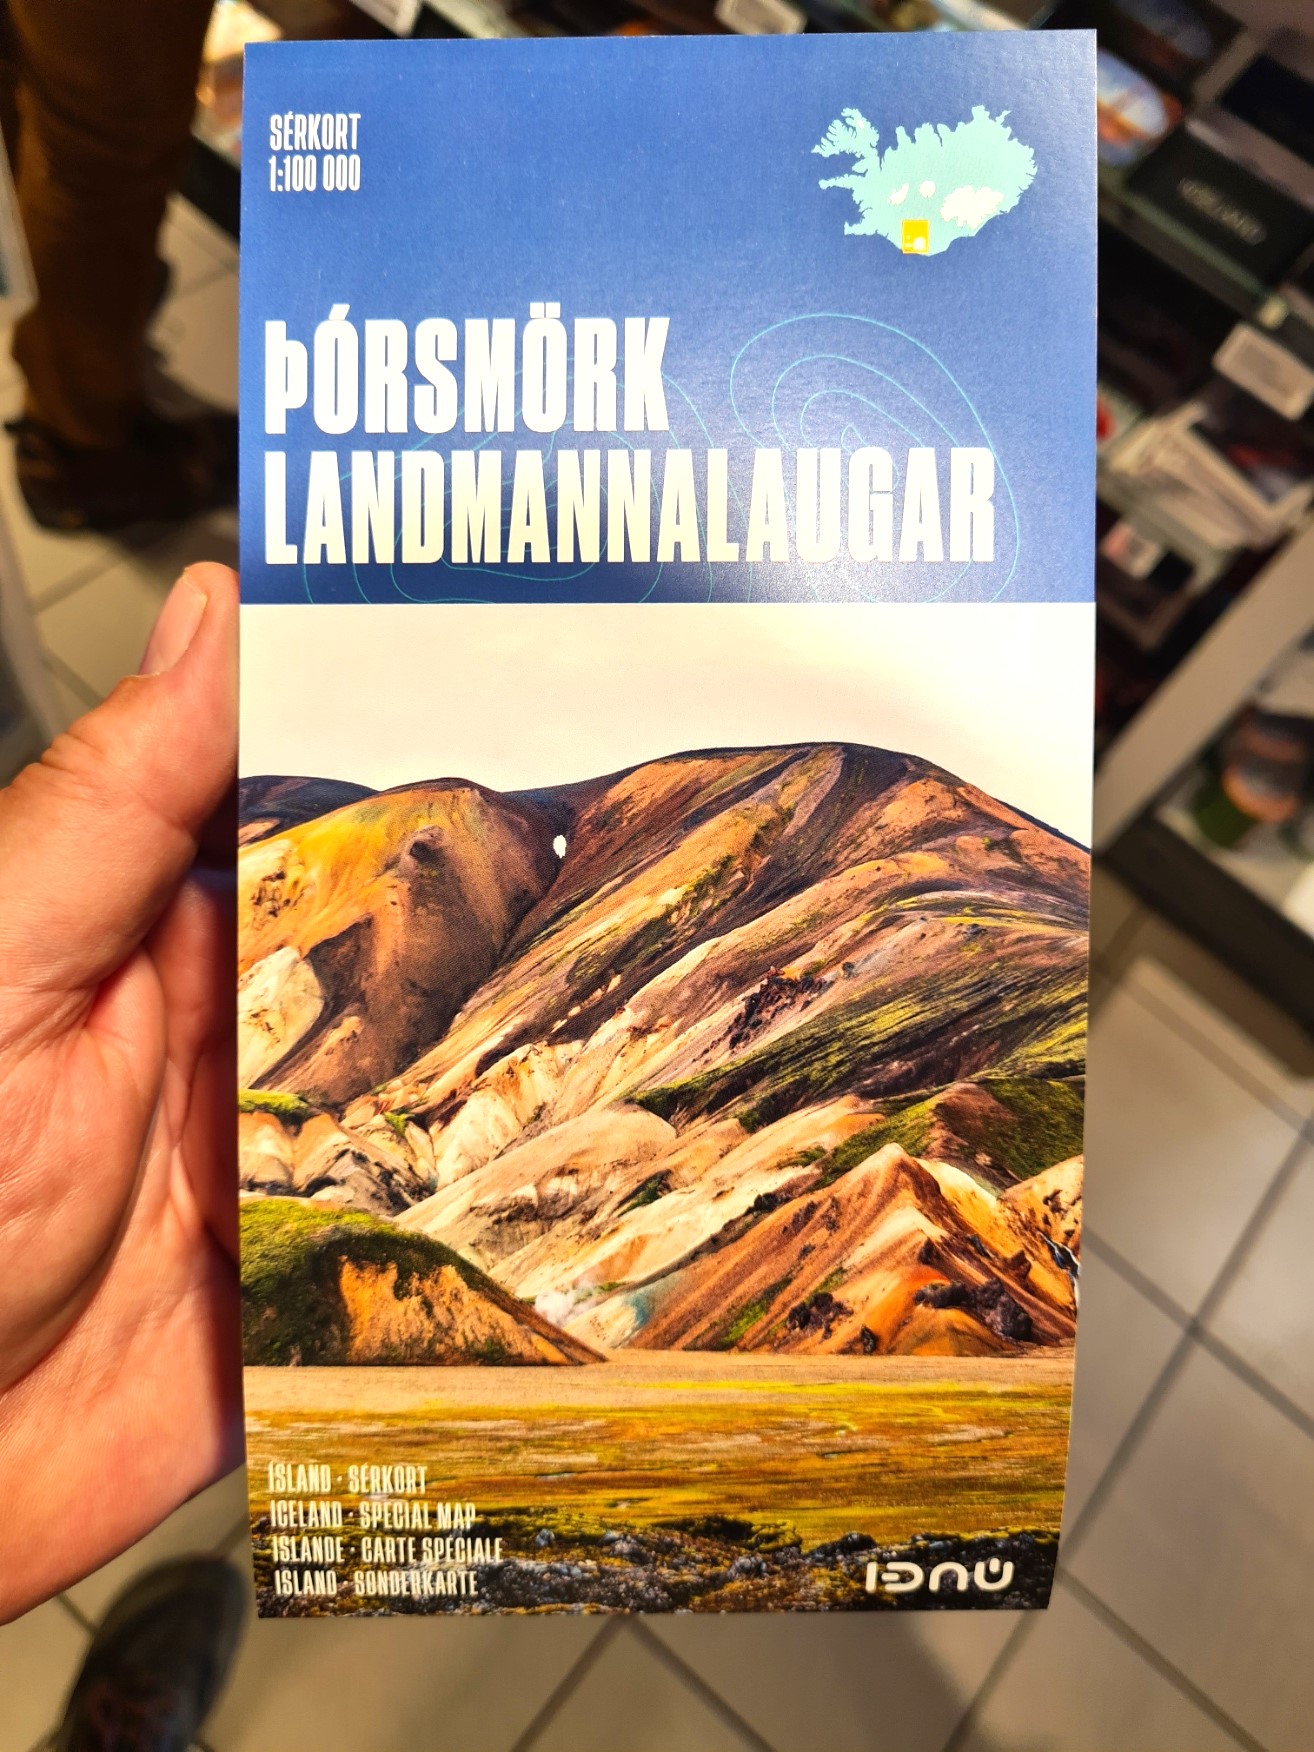
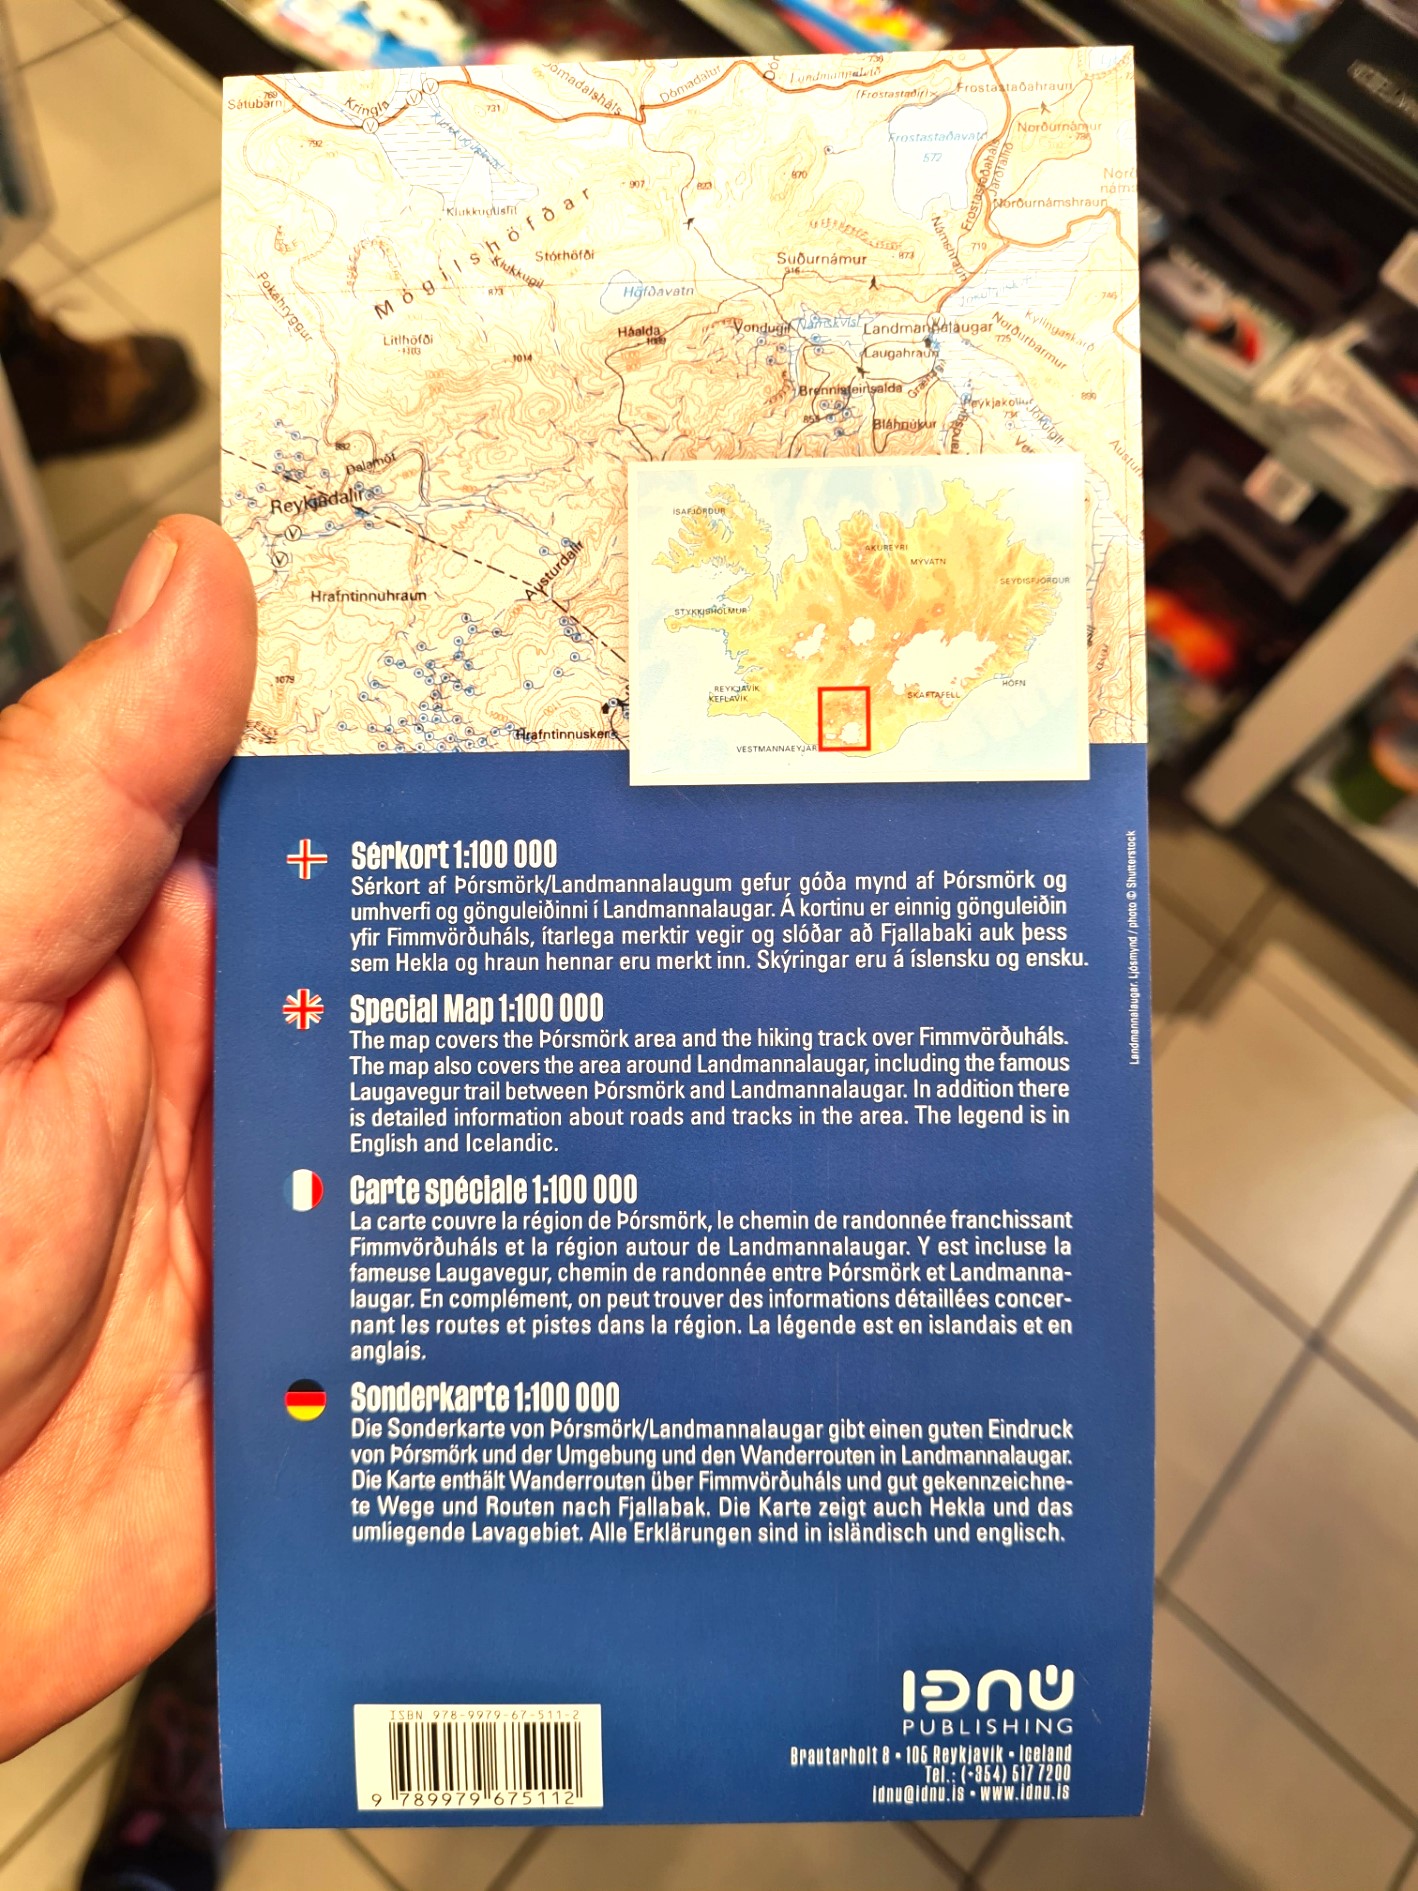
Finally, just for interest, and I’m glad I did take it, was a thin publication by Brian W. Zimmer called: The Laugavegur Trail, a hiking companion to Iceland’s Famous Trek. Ignore the guide element in this, it is his helpful guide to the geology passed en route that is of most help. The Sérkort 4 map would have been a good alternative to the map I did take.
- Trail talk: Iceland’s Laugavegur and Fimmvörðuháls Trails. Landmannalaugar to Álftavatn
- Trail talk: Iceland’s Laugavegur and Fimmvörðuháls Trails. Álftavatn to Básar
- Trail talk: Iceland’s Laugavegur and Fimmvörðuháls Trails. Básar to Skógar

I have just read a diffrent blog on Laugavegur and now I am scared to hike this trail. It was portrayed as a treacherous place where you can die any minute 😦
LikeLike
A bit over the top perhaps! It is a trail that obviously deserves respect, proper preparedness, careful selection of what is carried and familiarity with that, experience (or someone experienced to handhold) and good decision making. People have died out there. But it is nothing to be afraid of, it truly is a wonderful experience and much of the trail is perfectly within the bounds of most
LikeLike
i really enjoyed reading your experience, the details you include are really helpful for somone heading out solo in a few days. I like the way you described each leg. I was having a hard time figuring out where best to camp to transition from laugavegur to Fimm….couldnt find anyone else indicating best place to camp, so now I know to head to Basar, thank you! Helen
LikeLiked by 1 person
No problem, hope you enjoy your hike. Come back and say how you got on
LikeLike