
Like everyone else, Three Points of the Compass is currently social distancing while staying at home on Government advice during the current Coronavirus pandemic. My plans on completing two longer trails this summer lie in tatters. My consolation is that with good fortune I can enjoy them both next year, they will still be there.
I am very pleased that I managed my coastal walk on the North Kent Marshes to Faversham a few days ago as that form of extended exercise is very much frowned upon by the authorities today. Who knows when I, and all of us, will be able to get back out on the trails again. Amongst other things, not least attempting to share the house PC with Mrs Three Points of the Compass while the two of us struggle to fit in enough hours working from home, there is a degree of sorting out of backpacking gear taking place. For a change from that I thought I would practice my stove-making skills.
There are hundreds of YouTube exponents detailing how to make various forms of pop-can/alcohol/meths/penny stoves. I don’t tend to use any of these on trail as I find the well made commercial stoves robust, light and invariably efficient. Admittedly the traditional and bomb proof Trangia, which was my route in to meths stoves decades ago, isn’t the lightest of options however my Evernew Alcohol stove is a truly cracking piece of kit and only weighs some 36g. Three Points of the Compass did spend some time producing a home-made version of screw-top burner with insulating felt inner (Part 1, Part 2) and this has worked well on a couple of trails. But with a couple of hours to spare at the weekend and a break from work, I thought I would indulge myself with a bit of experimentation and see what home-made stove I could produce, with the tools I typically carry with me on trail. It is easy for anyone to knock something out with sharpie pens, robust scissors, dremel, steel rulers, felt wadding, grit paper and work gloves etc. however I wanted to see if I could make a workable option, that I could knock up in the event of unexpected loss or breakage of my stove while actually on trail.
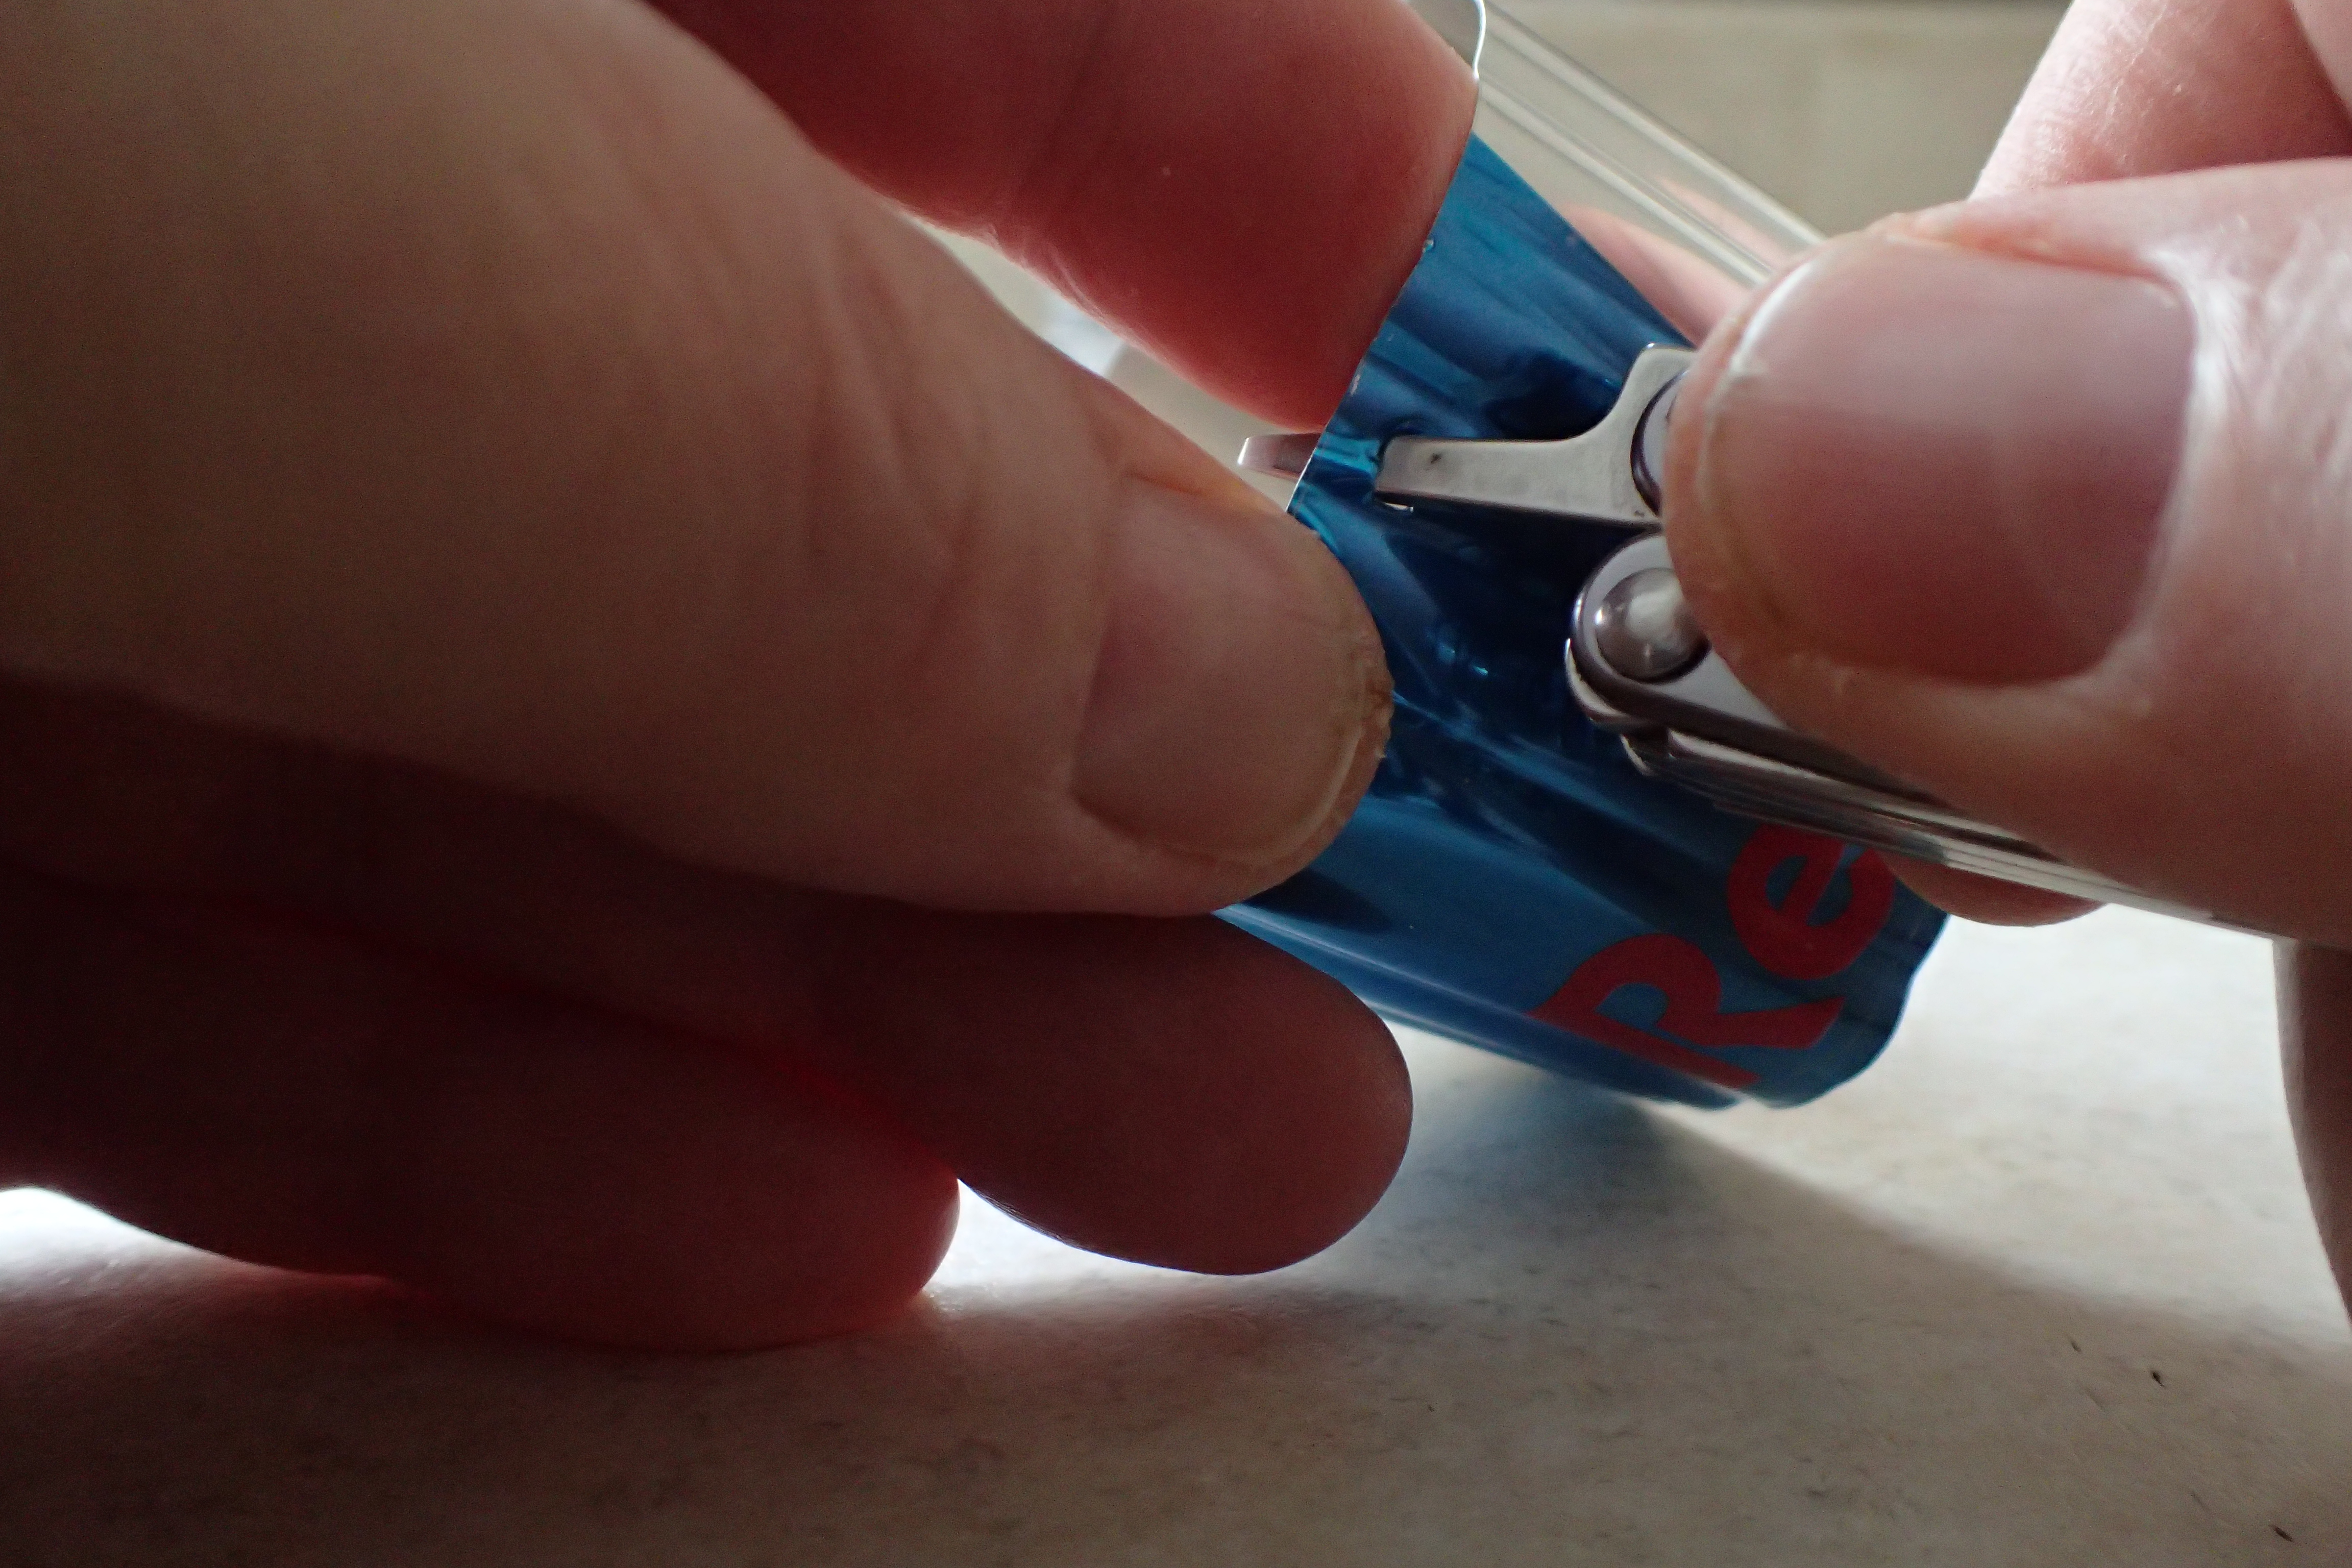
Look in any hedgerow or bin and you will invariably find an empty can of coke, energy drink or similar. My choice for constructing my DIY stove was a single 250ml drinks tin. I have written before on my favourite knife for taking on trail. While I do occasionally switch things around just for variety, nine out of ten times I am carrying the excellent Leatherman Squirt S4. This provides five things for my task- Scissors, knife blade, ruler, a ‘punch’ (in this case, the thin eyeglass screwdriver) and a straight edge.
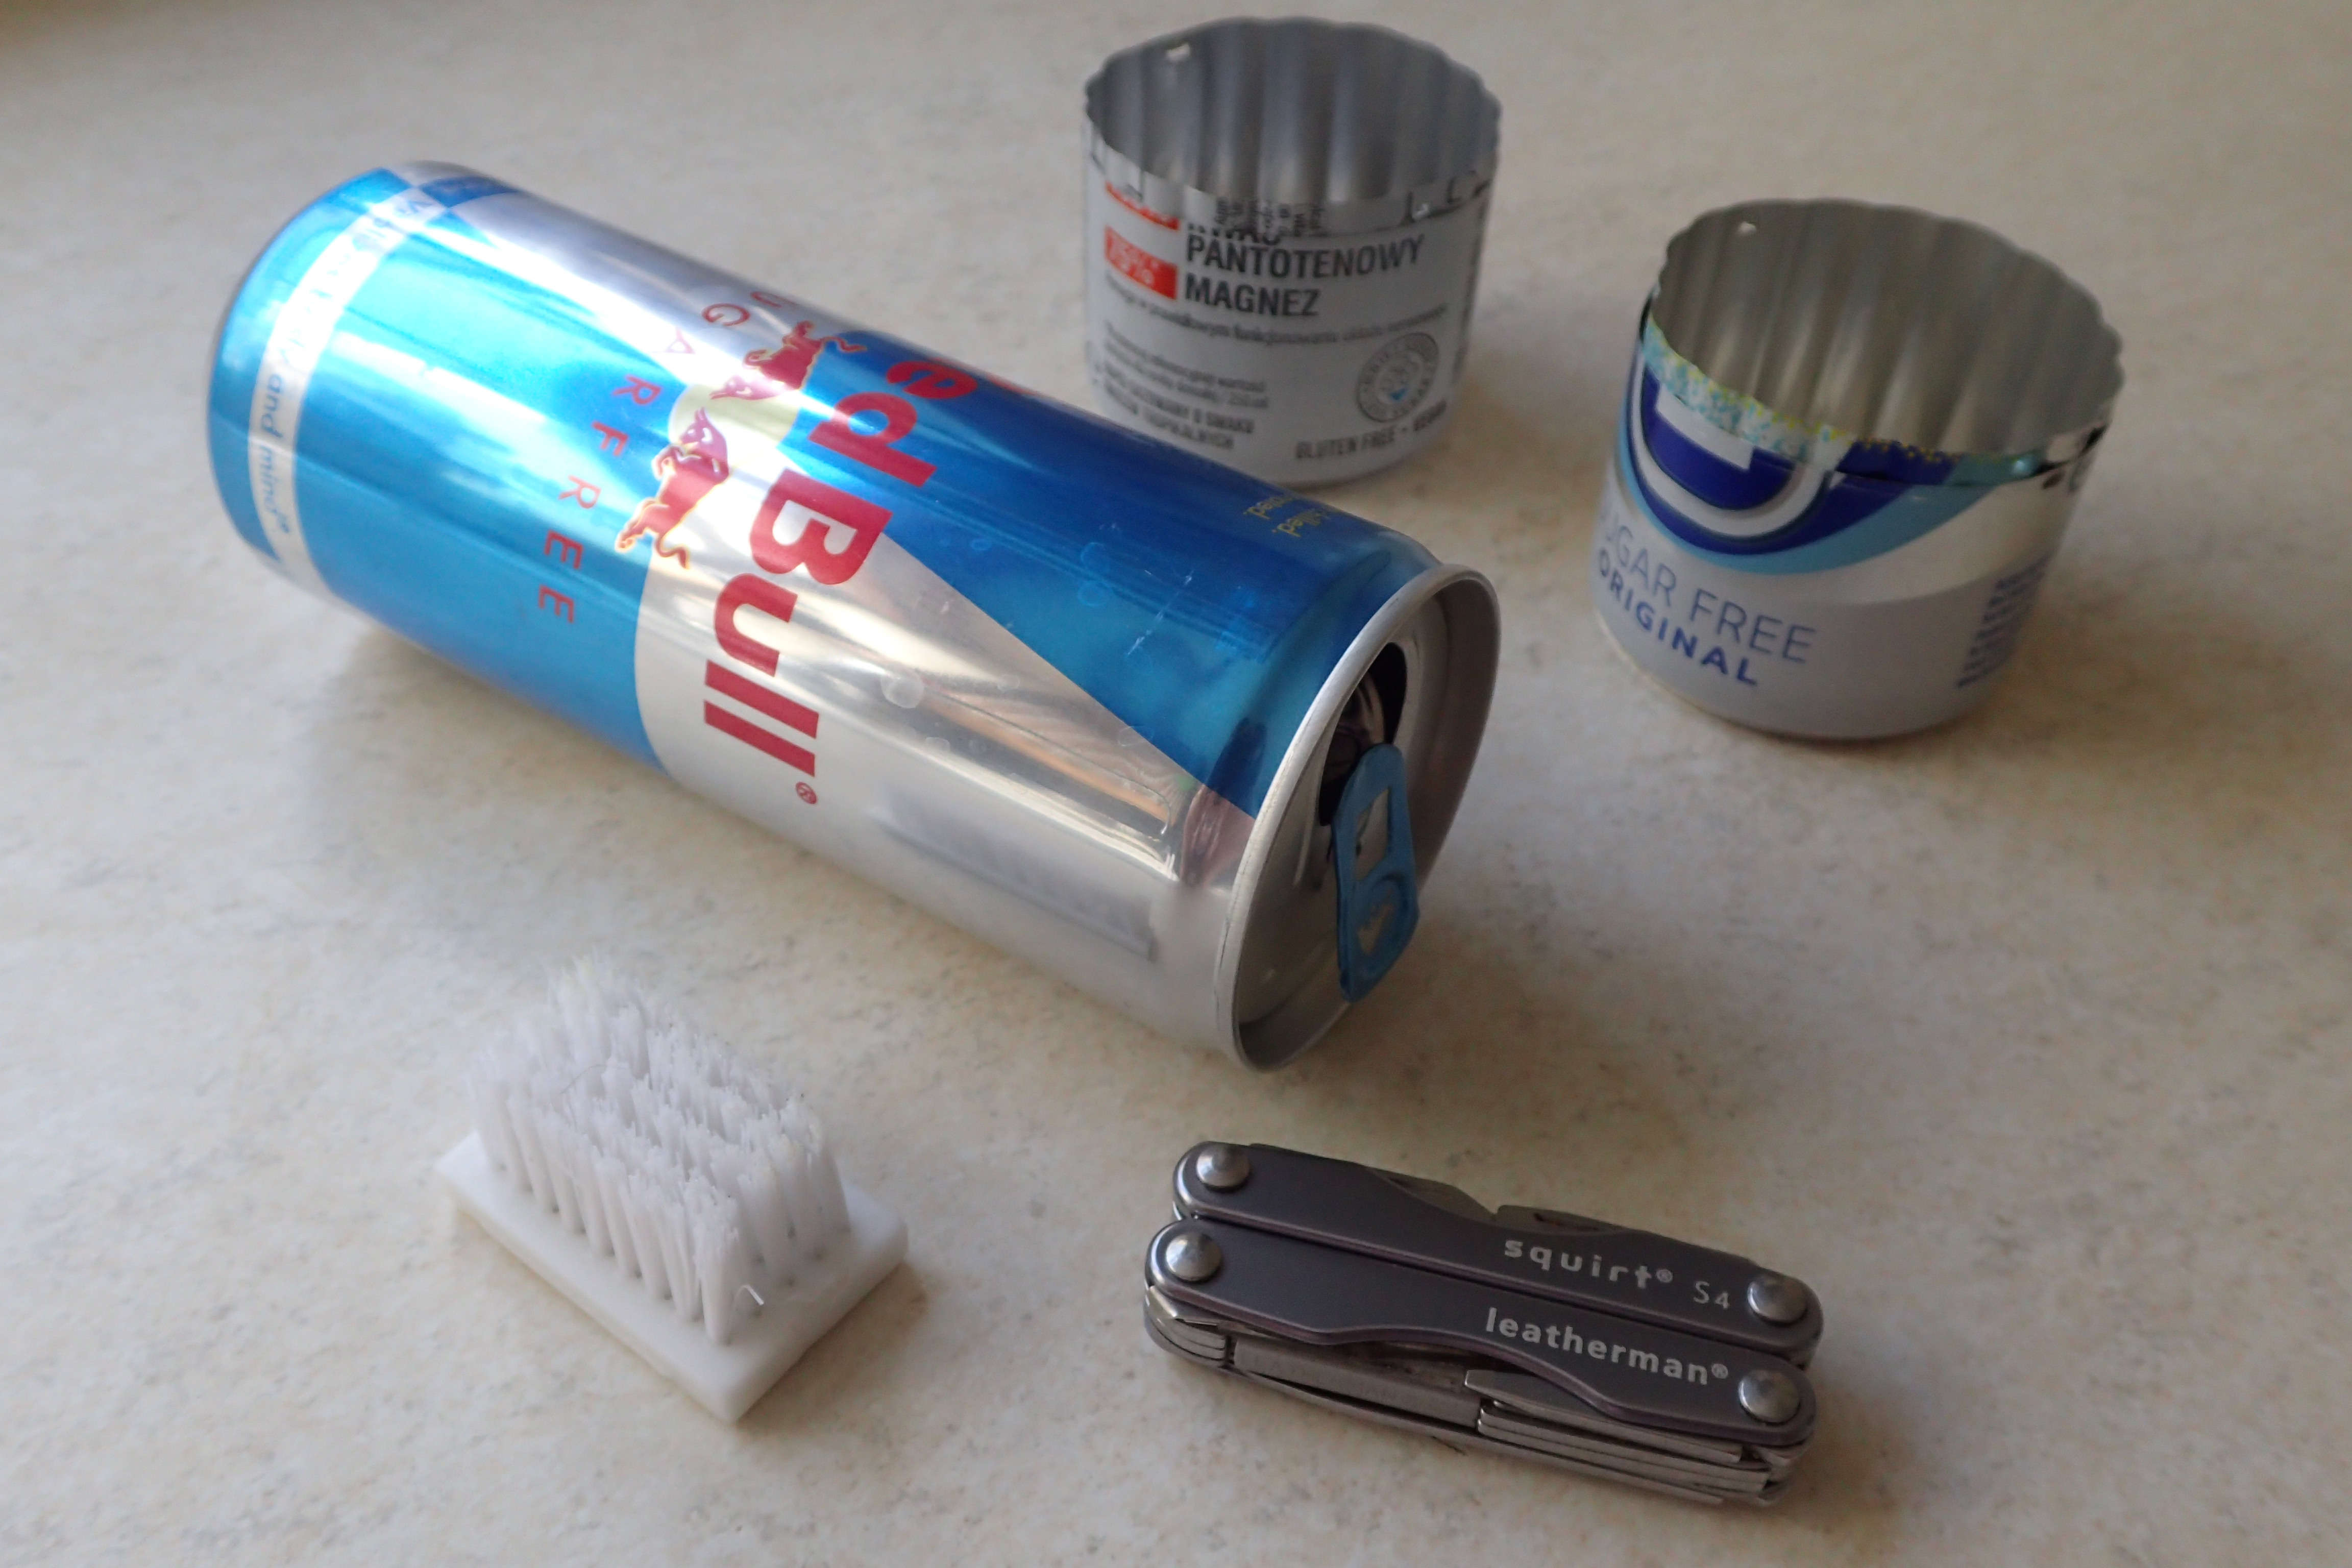
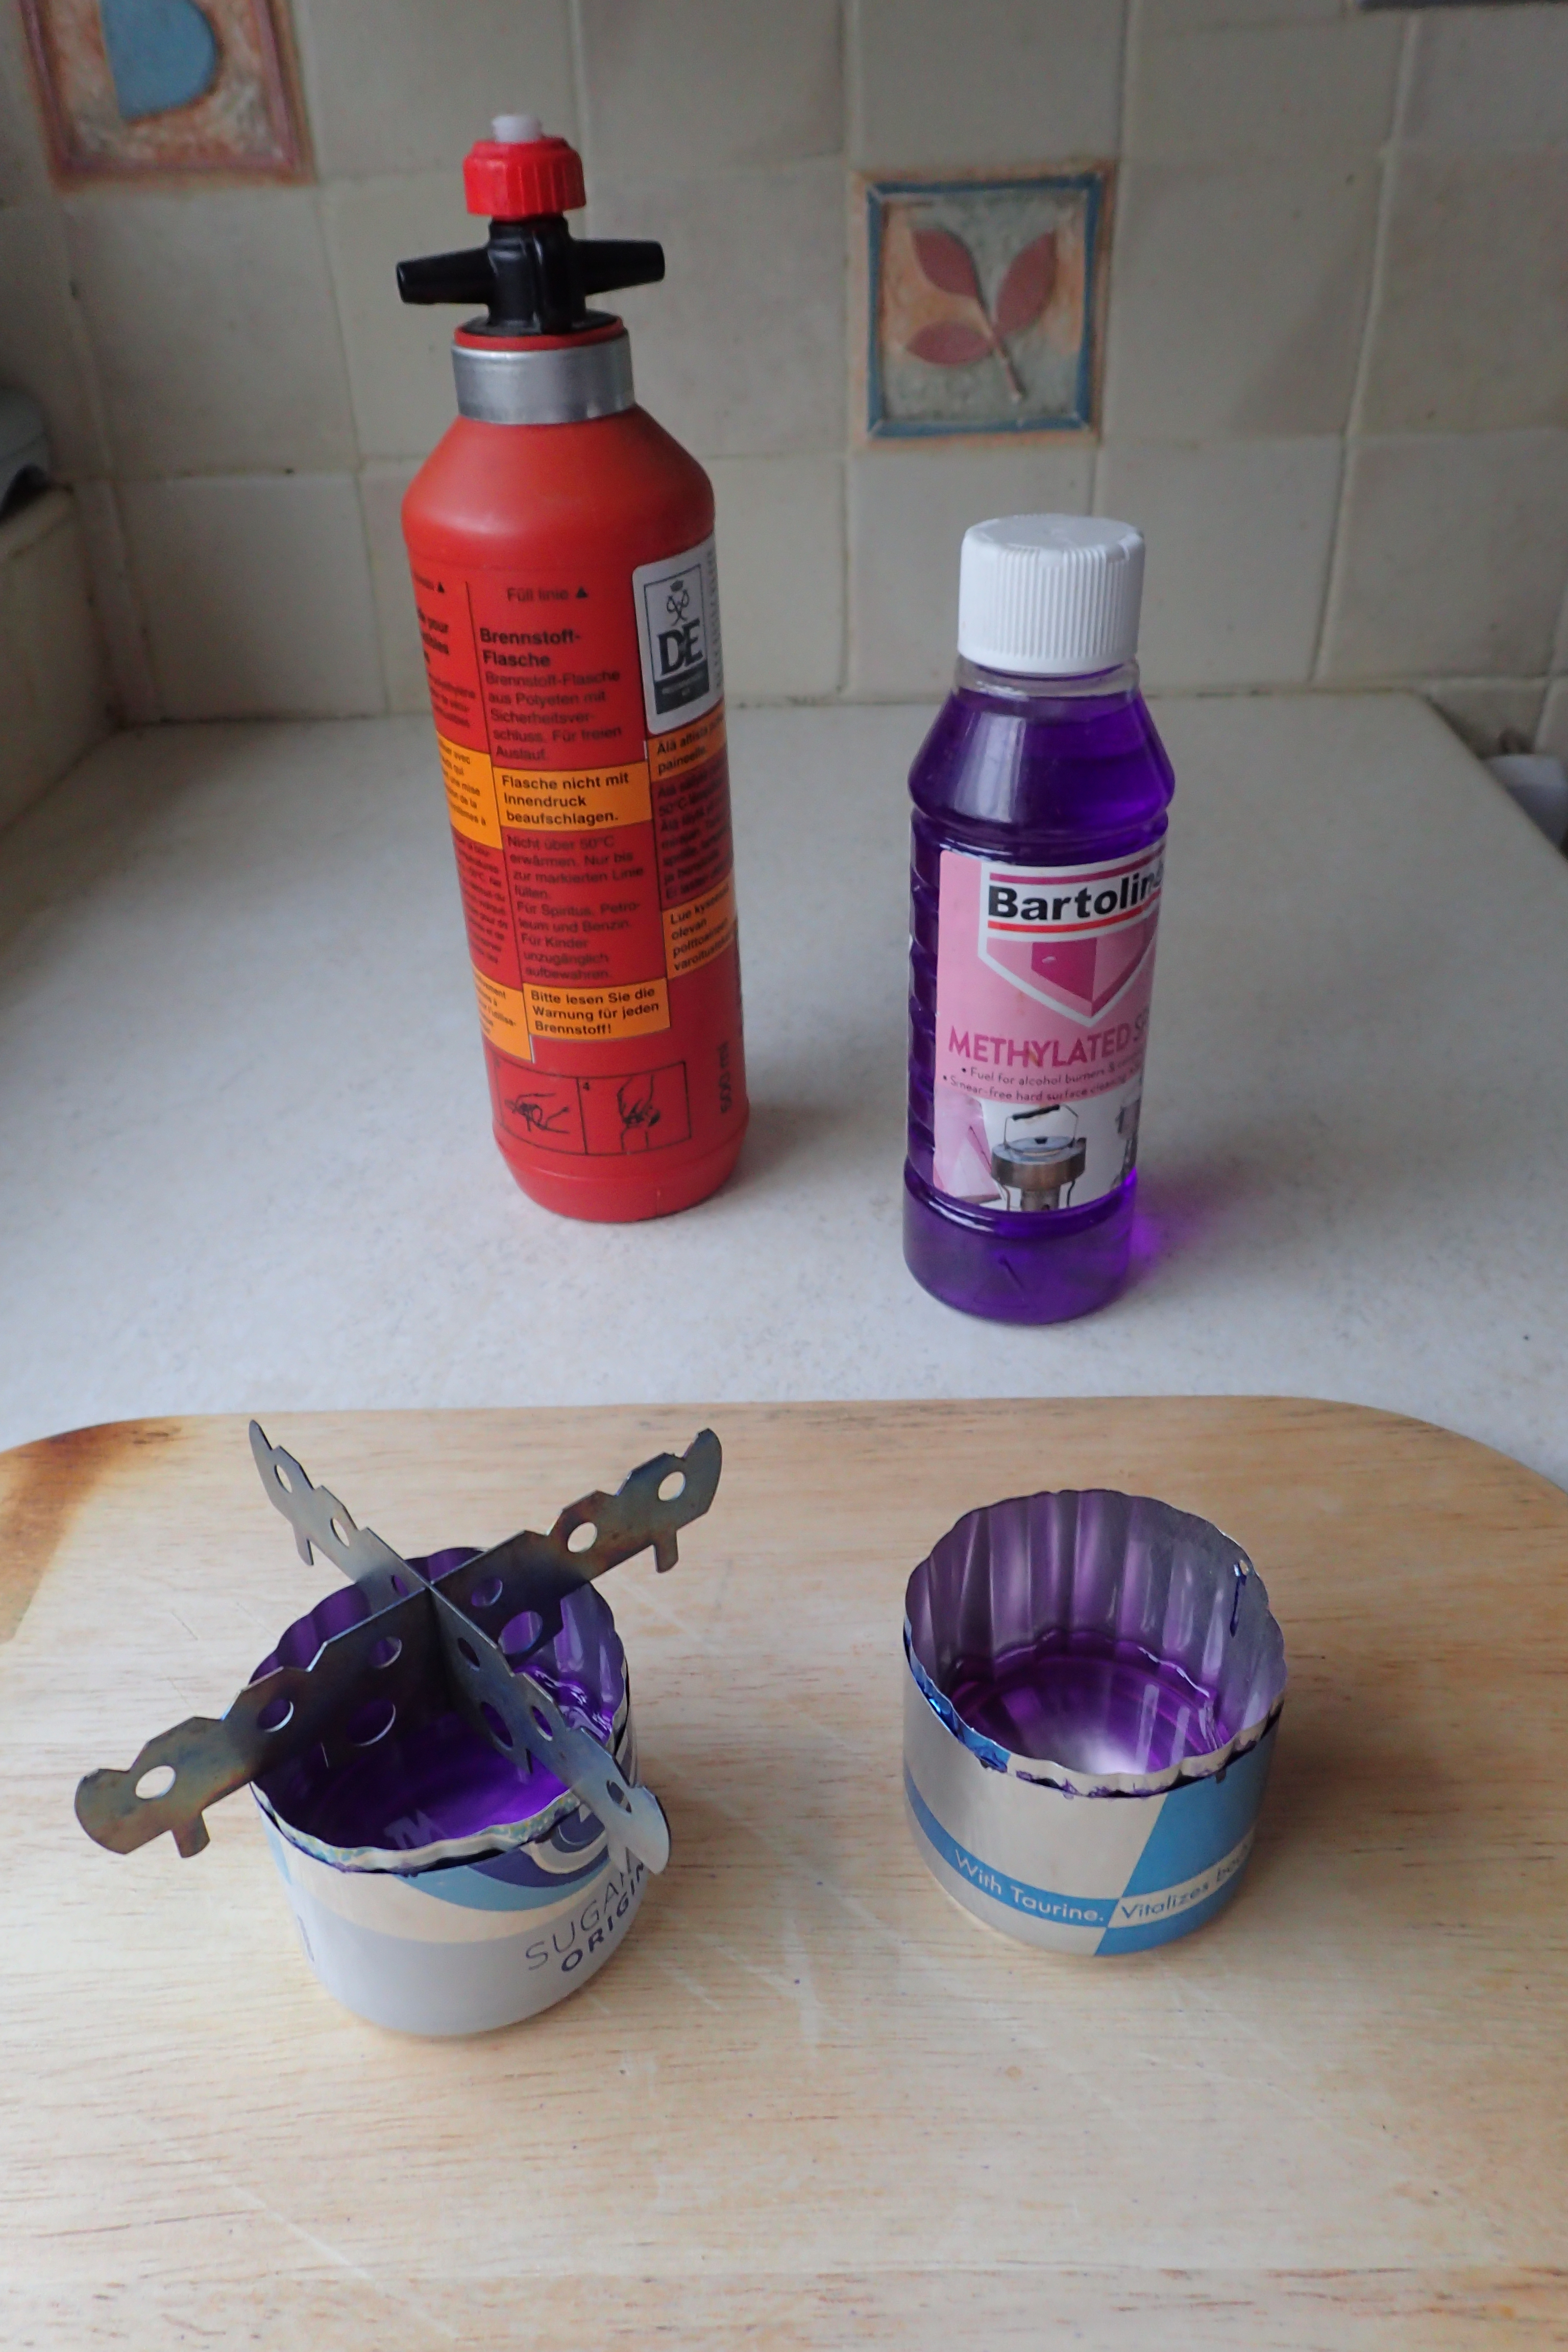
Everything required to make my basic on-trail, drinks-can meths stove, with two completed examples
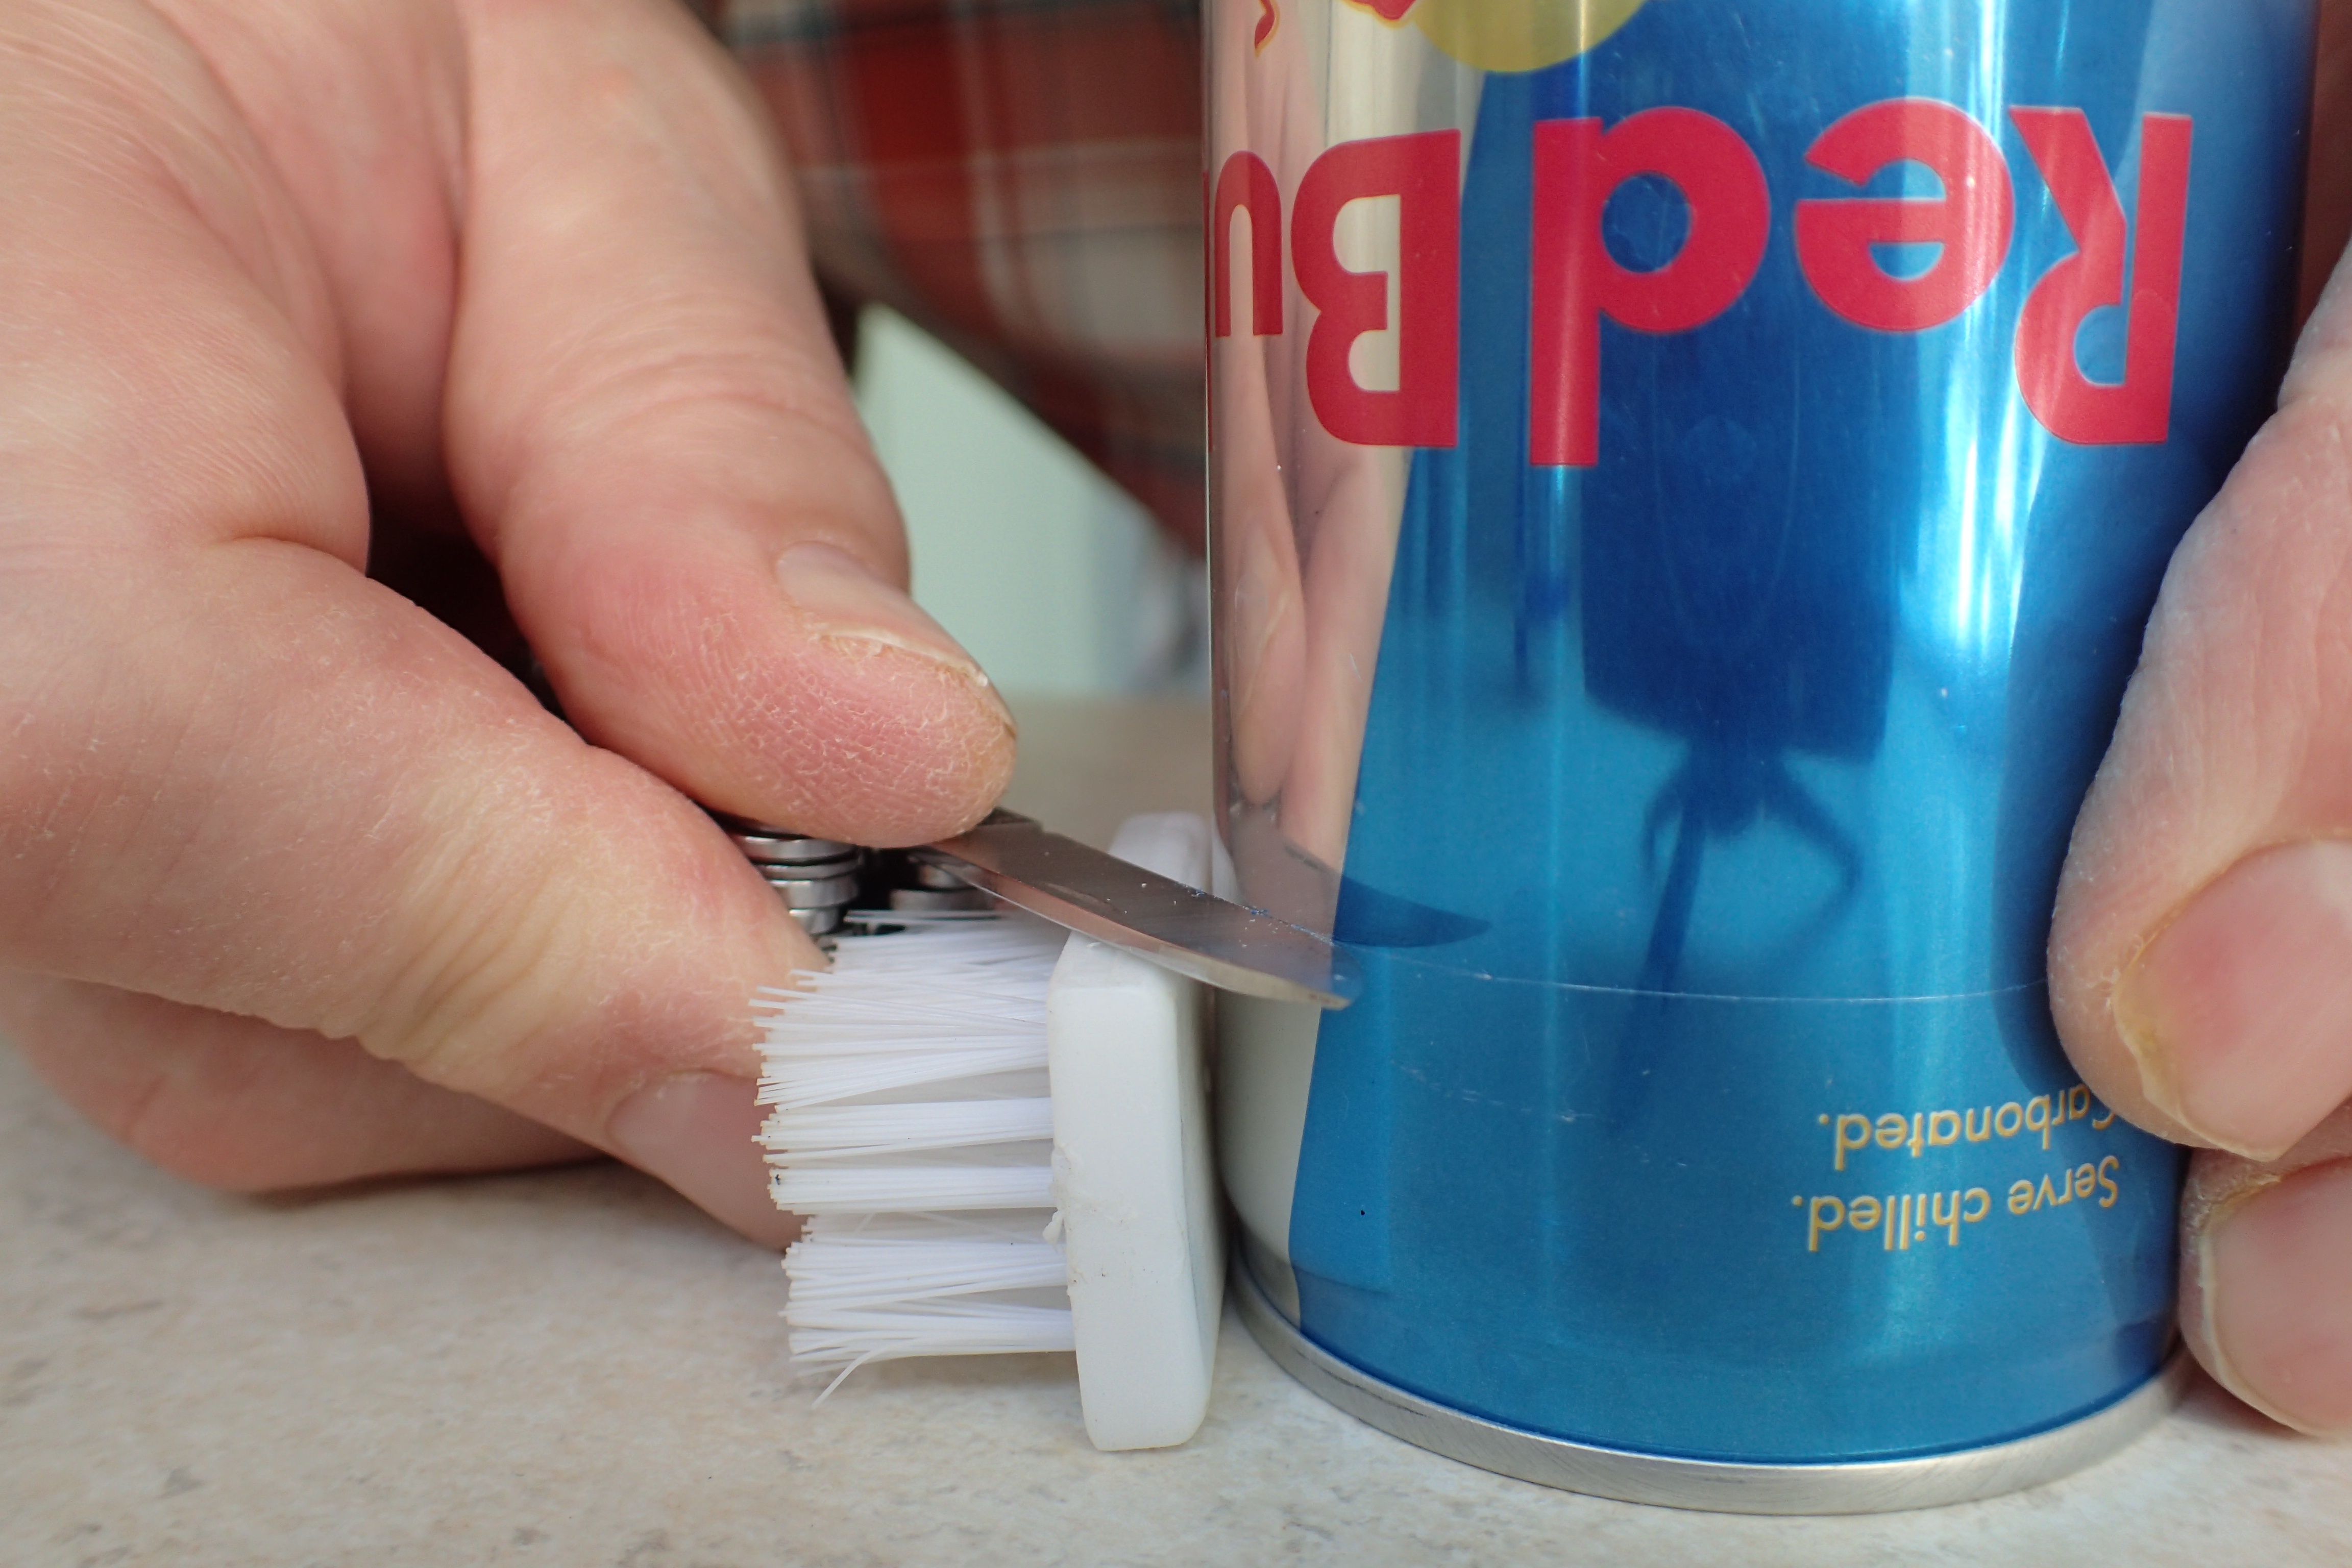
I only required the ruler to identify another item from my regular kit that I required for the job- ‘something’ that was 1.5 inches long. Five years ago I wrote about the small nail brush I carry in my ditty bag. I still include the 7g brush in my kit list. It has often been useful for a bit of clothes washing on grottier trails, even for its intended use of cleaning my nails of trail grit and grime. It has been changed over the years, but I bought a handful of the cheap brushes at the time so have enough spares in a drawer somewhere for another few years yet. It could have been something else from my various bits of kit carried, but this measures 1.5 inches, so made the ideal second tool for my task. And that was it- a 1.5 inch measuring block, my Leatherman and the donor drinks tin.

Resting my knife blade on my one and half inch block, the drinks can is rotated against the edge to produce a scored line
Inverting the can and placing my plastic block on it’s long edge, another line is scored

Ends are cut off with the Leatherman scissors, final neat trimming will follow

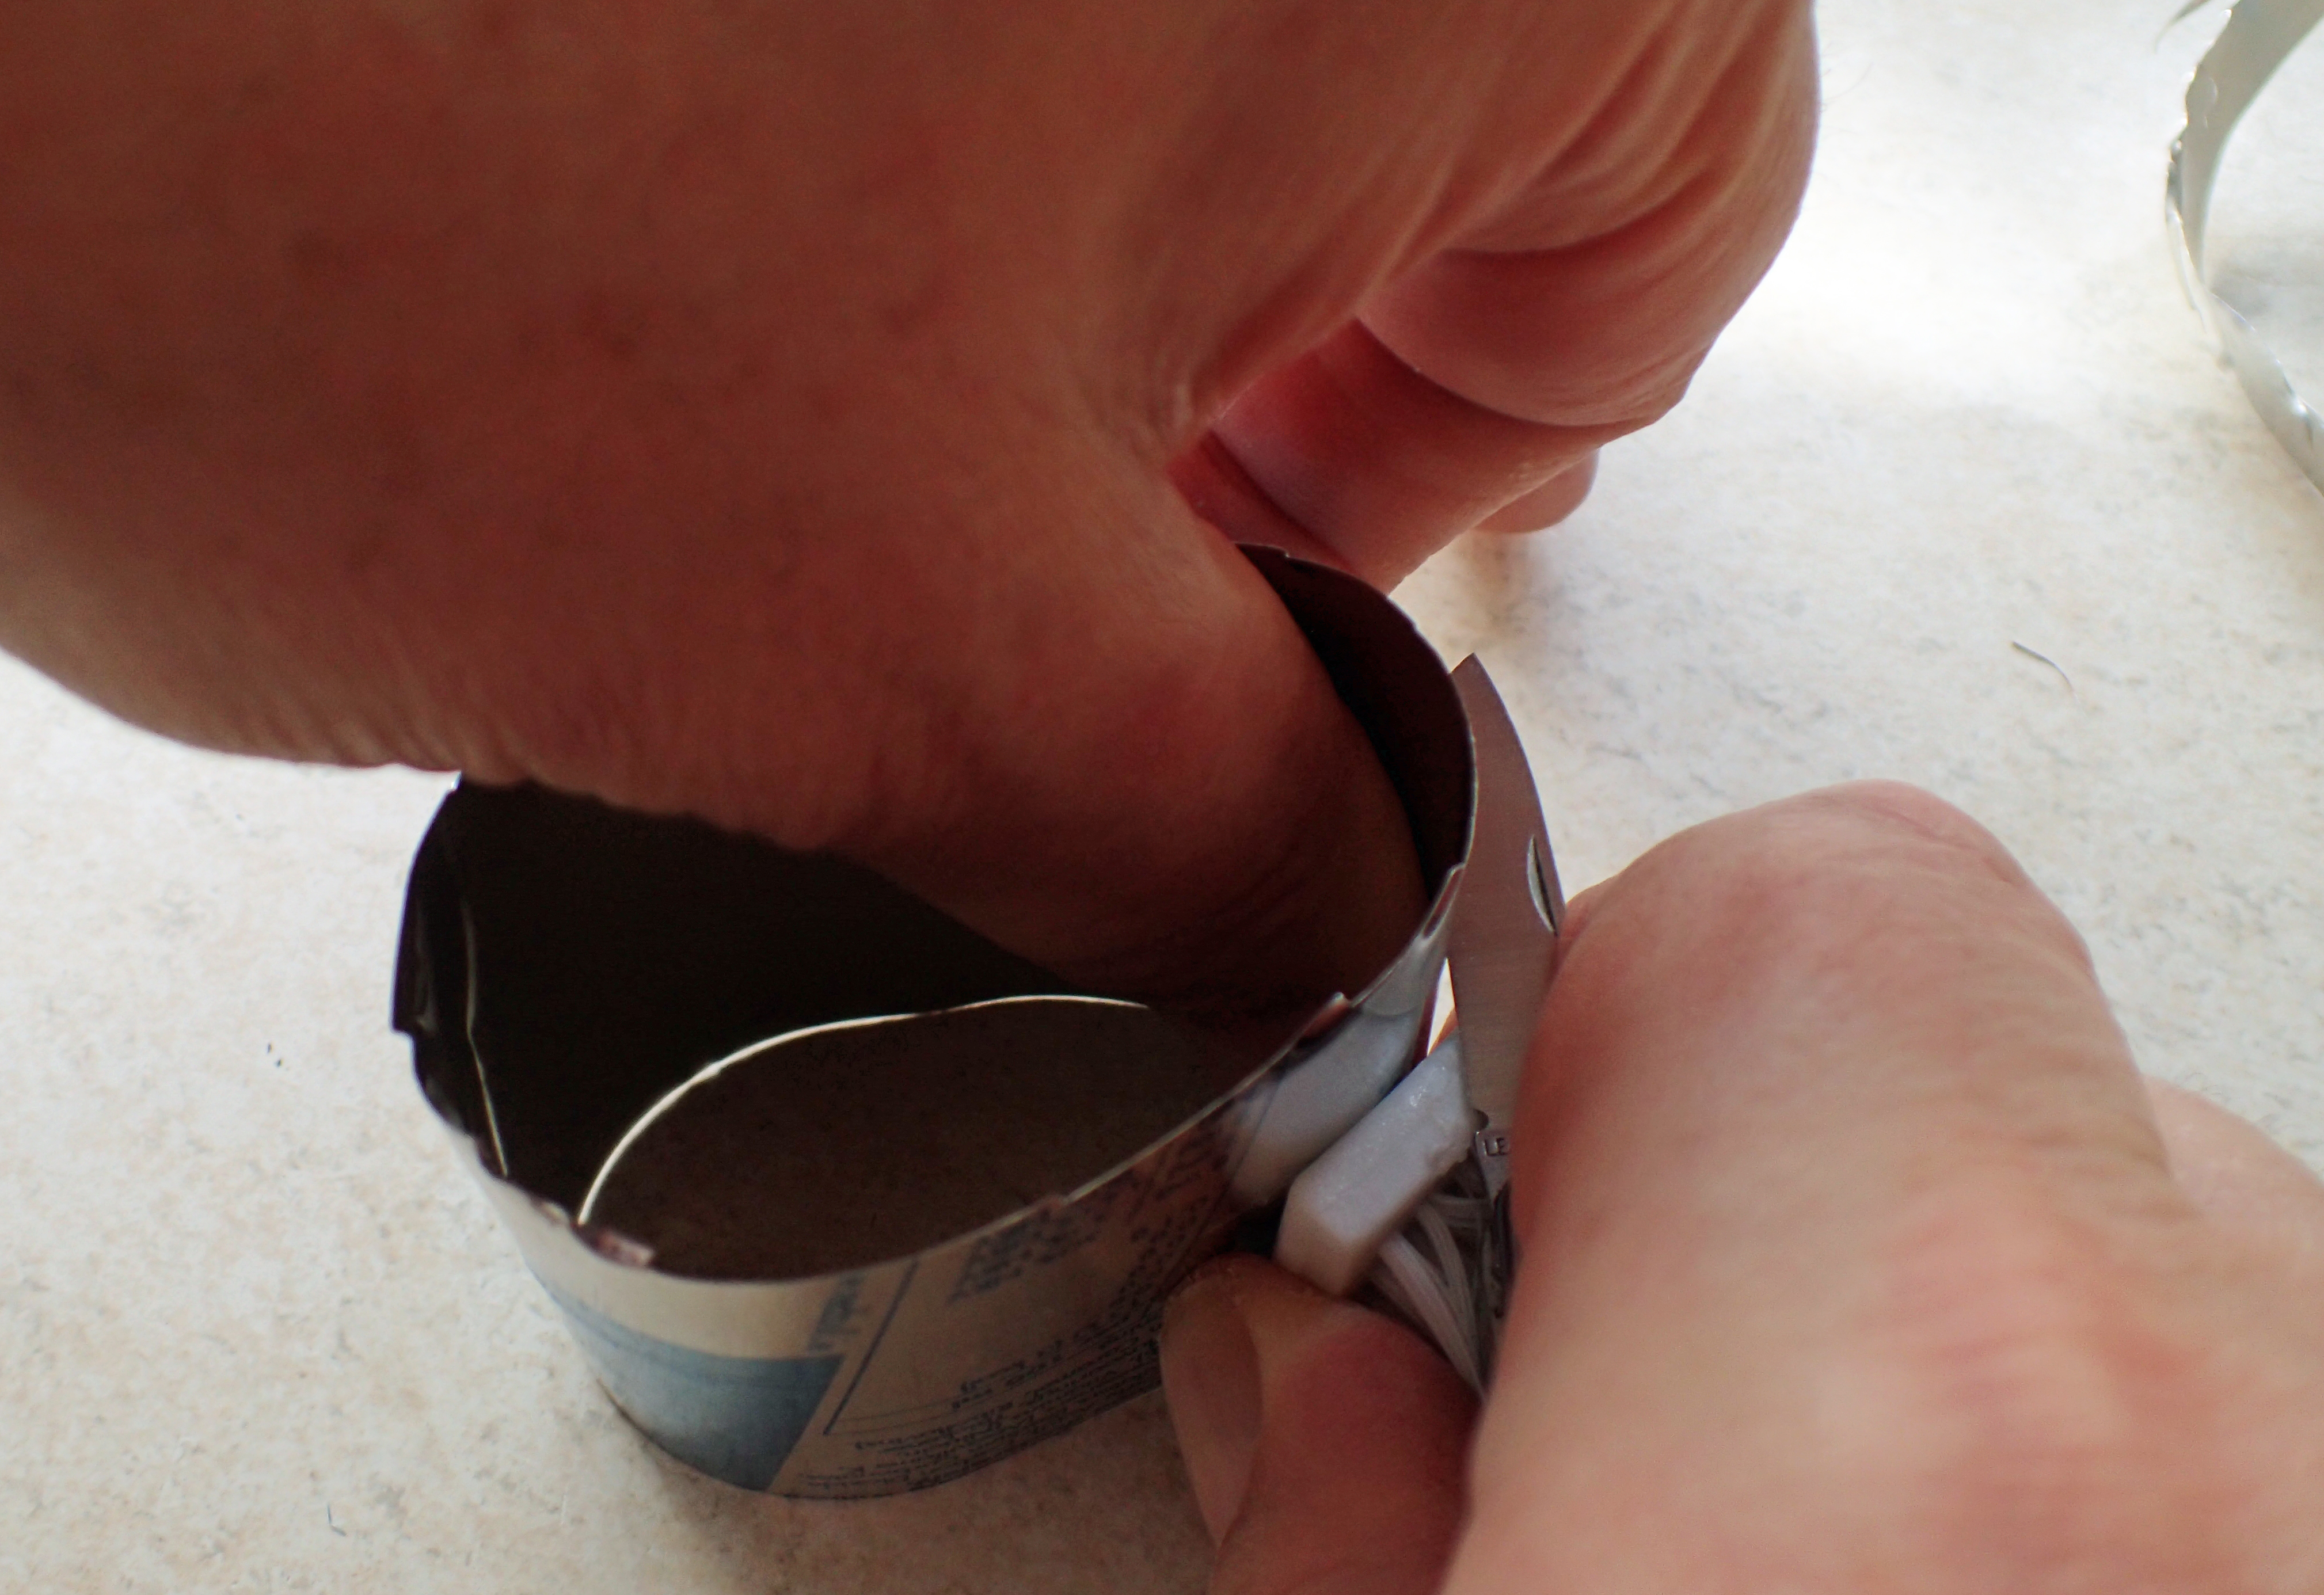
Slowly, with care, the two straight edges are tidied up and cut
The cut tube, with one neat edge and one rough edge, is inverted so that the tidied neat edge is flat against the worktop, then again rotated, holding the tube against the 1.5″ measuring block and knife edge, producing a final scored line
With care the final rough cut edge is tidied up with the Leatherman scissors

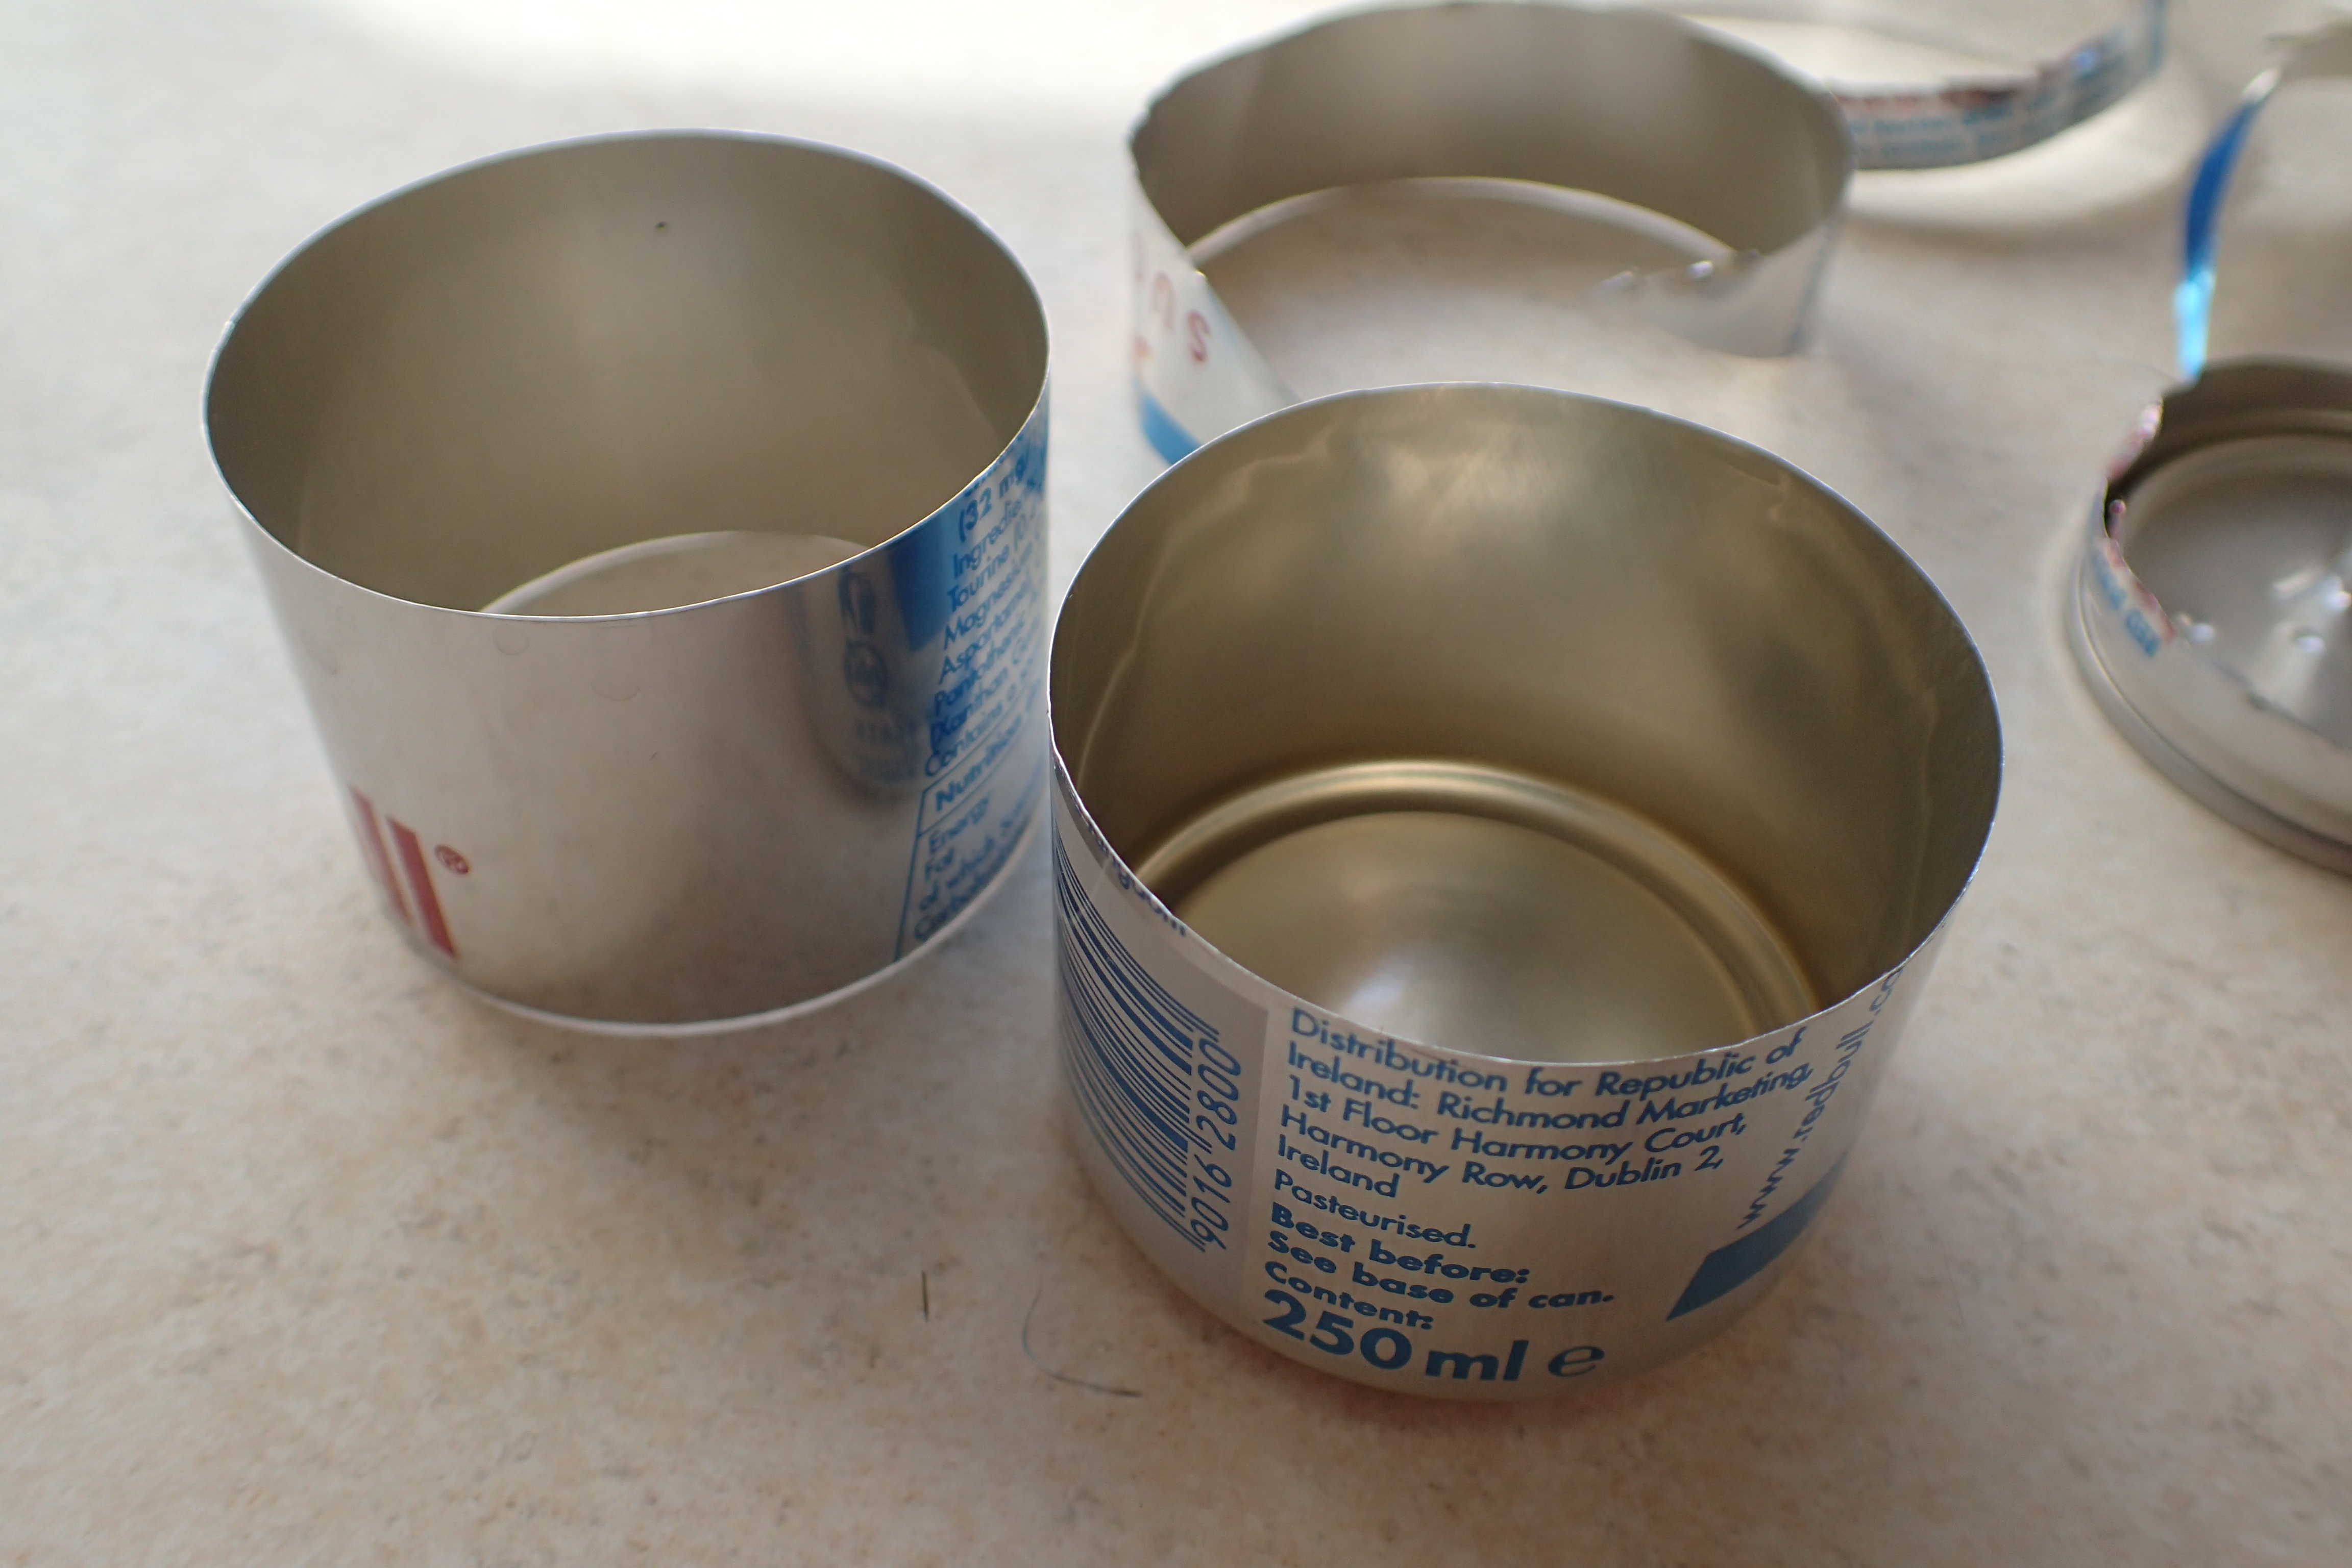
The metal tube is then rotated in the hands, and folded against my straight edge, producing a series of creased folds around its circumference
Two small holes are punched just below the top rim of the tube, these reduce pressure in the stove when burning
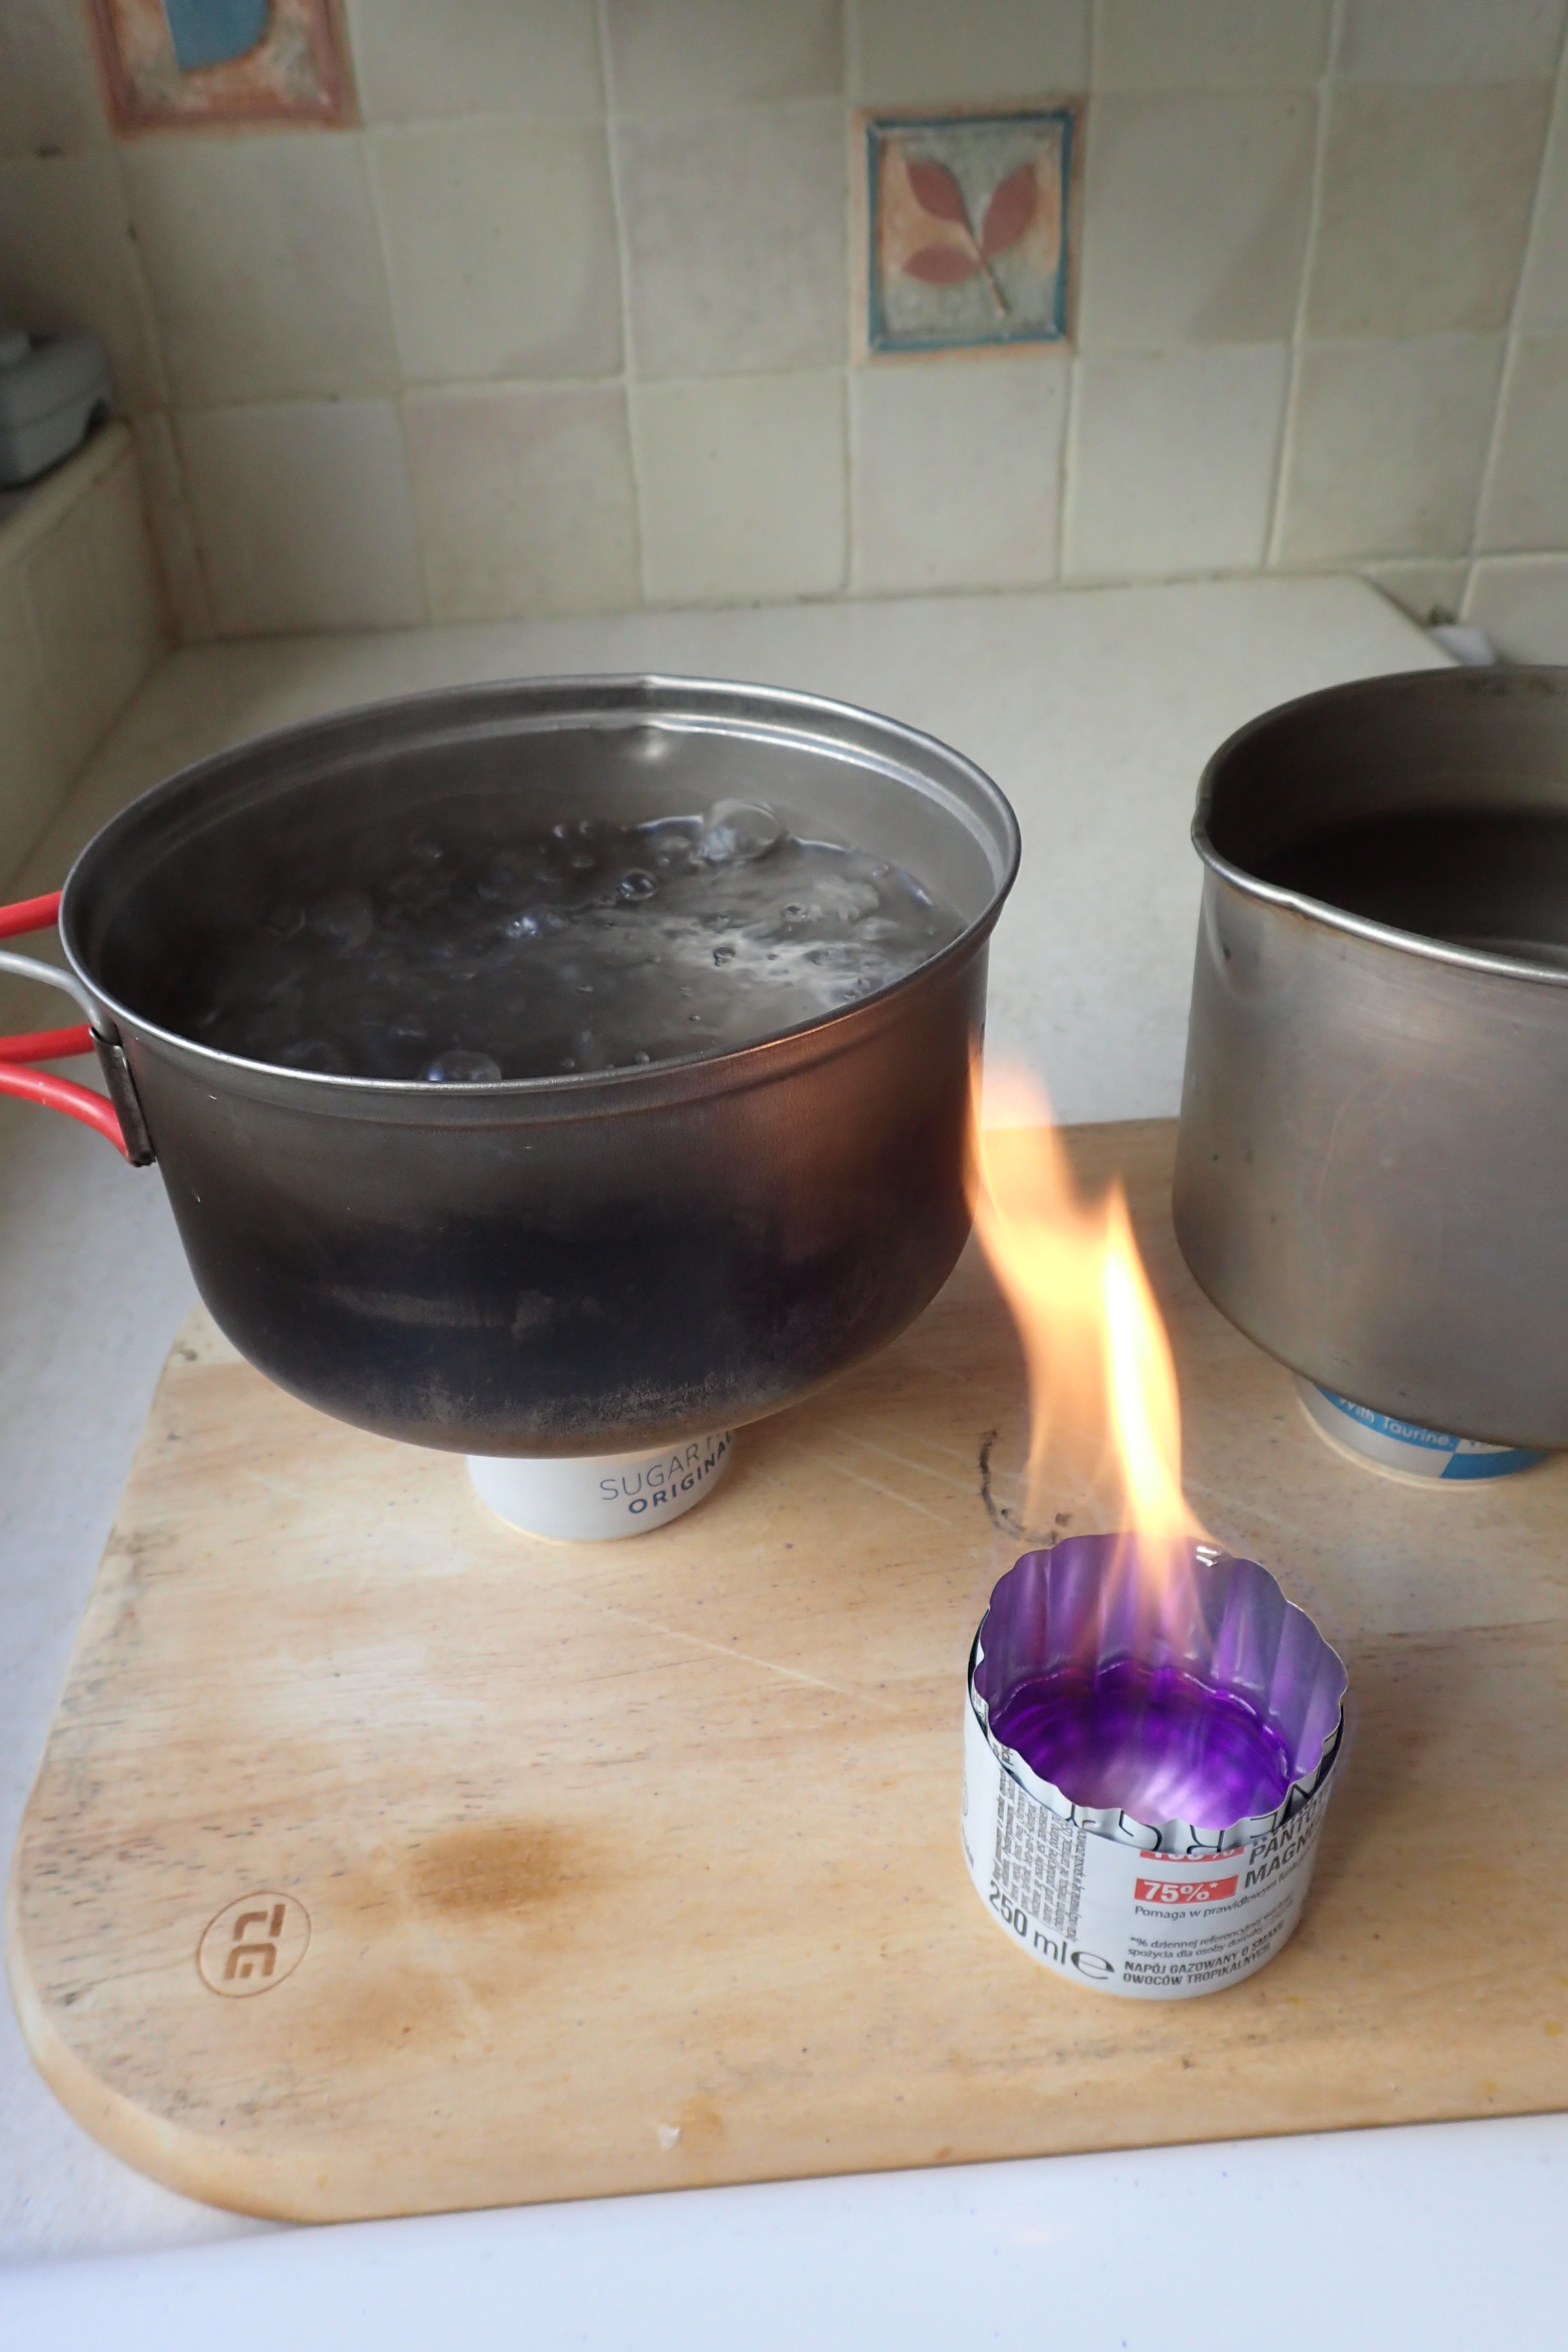
The crimped tube is inserted inside the bottom section of the can and pushed firmly down. That is it, the finished stove. Having made a few more to see if I could do a neater job, it was time for burn tests. 25g-30g of fuel. I tried the stove both au naturel and with a 7g titanium trivet that raised the pot

Pots were a 1lt MSR Titan, and a 900ml Evernew pan, each holding 600ml of water. Stoves were stable and rigid with no evidence of buckling. The trivet raising the Titan pot enabled the meths to boil and burn faster from the centre as well as the jets. The Evernew resting directly on the stove dramatically reduced the burn, producing a far slower and controlled burn

With pan resting directly on the home made stove the burn is steady, controlled and slow. The water boiled eventually but takes three times longer than when the pan is raised
Cheap and cheerful pop-can stove. Not a particularly refined stove at all, but it works
So, lessons learnt…
This would be a very easy stove to construct on trail provided I can find a donor can. I am almost always carrying the only two other items required to make it. So, if I ever do lose my meths/alcohol stove and have to make one, this will do the job.
While I do occasionally pack along the little 7g titanium trivet, this isn’t always the case. Using the trivet speeds up a boil time considerably however. But the water will boil given time and I am never one to look for the fastest possible burn. This actually gives the opportunity to simmer as well. I never bothered with recording times as that is largely irrelevant. This project was indoors, with no wind and a stable warm temperature. No doubt a windscreen would aid use greatly if outdoors. But it shows the principle is sound. One final point of note- over sixty minutes I knocked up six of these stoves, their weights were between 5.1g and 5.5g, so truly a lightweight option. A couple of hours well spent while on lock-down.

Instead cut a section of the can for the internal tube that act as pot support and provide capillarity jets, use the top part of the can, removing the part with mouth hole, so have a more sturd pot support.
LikeLiked by 1 person